
I’ve been thinking long and hard how badly I needed to write this post.
Let me just start out by saying, a gutted kitchen remodel is not for the weak hearted. I in fact, am weak hearted. By far one of the hardest things I’ve ever had to live through. (house fixing wise) I decided to write this in more then one part, as it was such a huge undertaking. I will do my best not to bore you guys, but I can’t make any promises.
 I think we’re going to have our hands full
In order to start the kitchen, we had to gut and remove a bathroom. This bathroom was once the pantry we’ve been told, but not since we have lived here. It served it’s purpose as a bathroom close to the kitchen, (so gross) however, we did not need two full bathrooms within 10 feet of each other on the same floor. We wanted to gain some space in the kitchen, so removing the bathroom was the option we went with. This IS restoration, so removing some of the original footprint to the home was hard for me, but this is truly the only wall we will remove in this house.
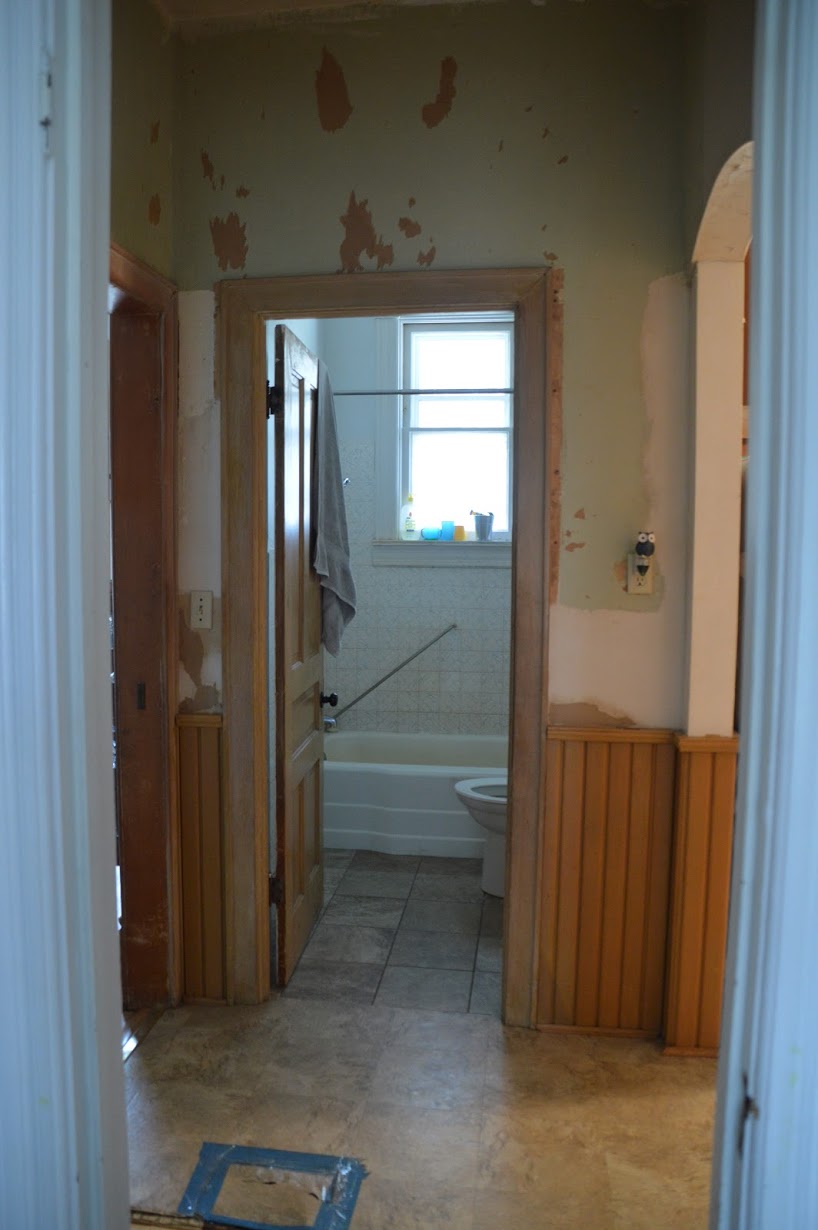
Goodbye bathroom, it’s been real
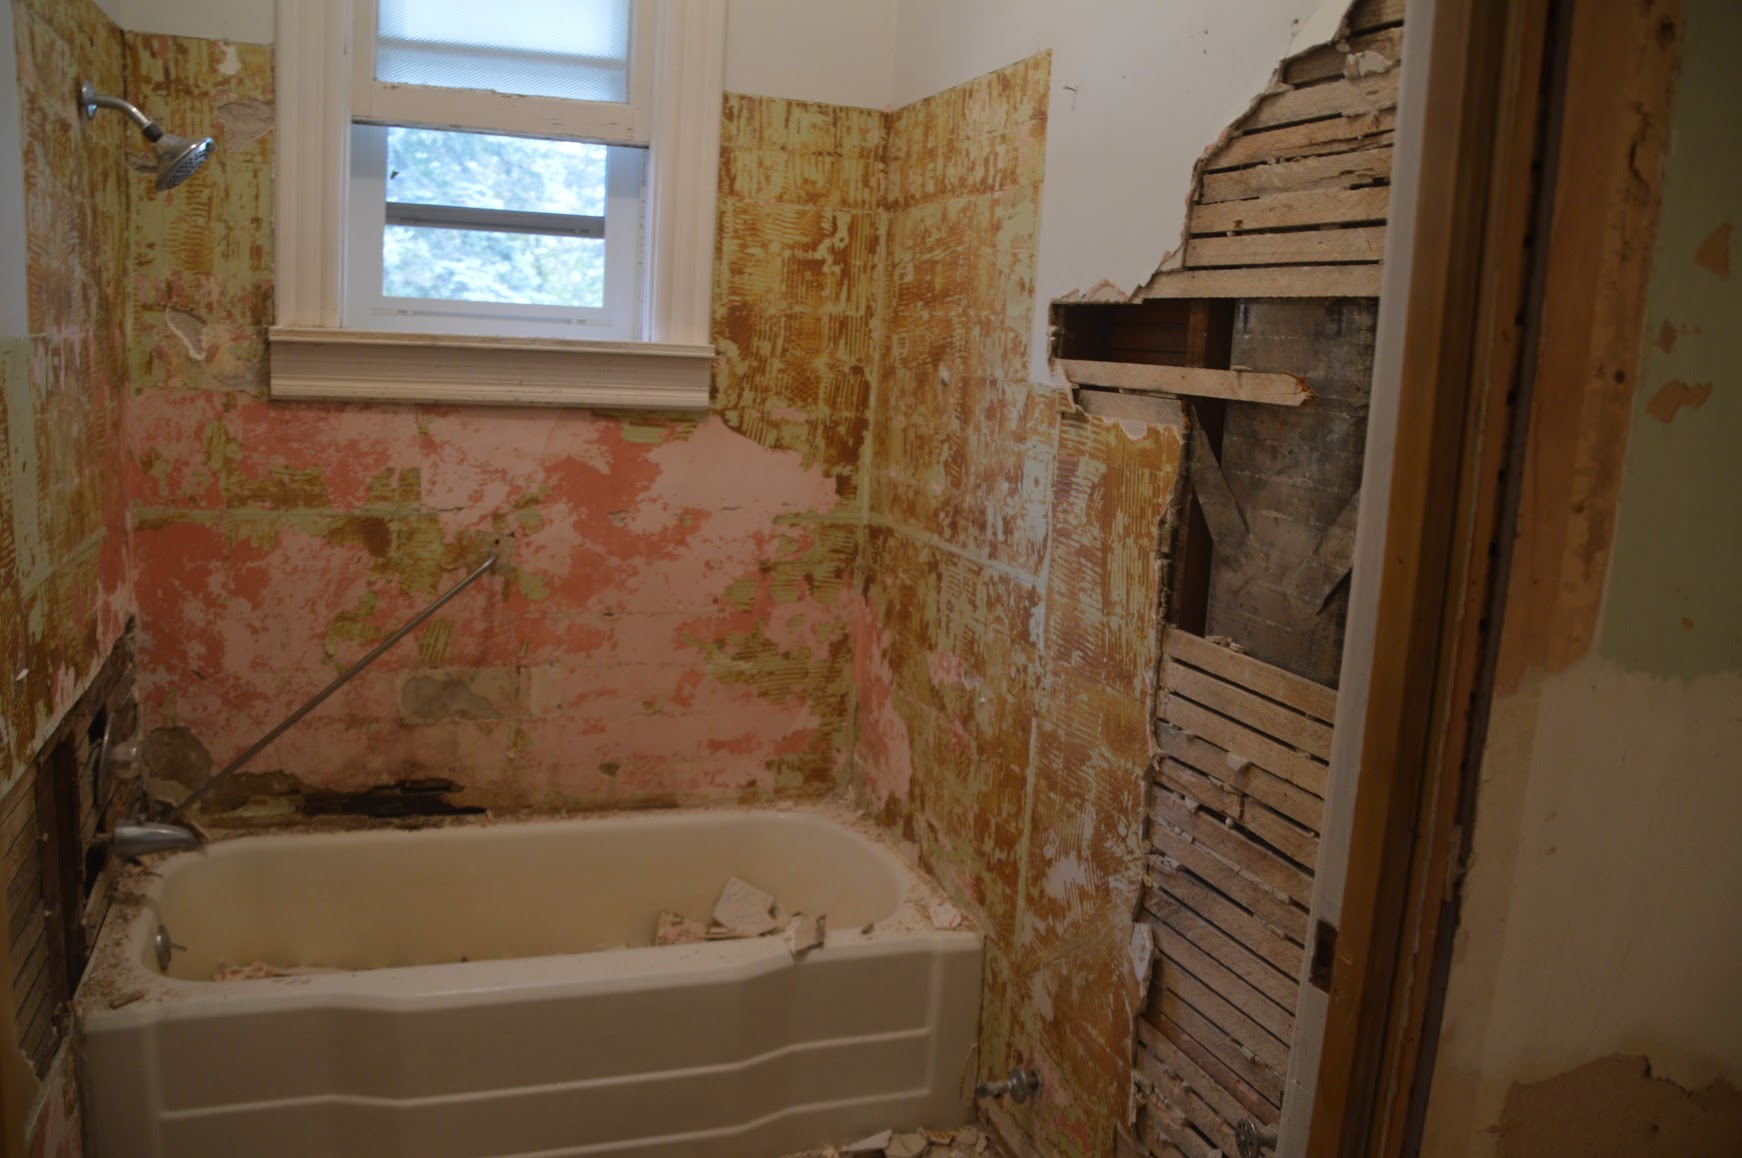
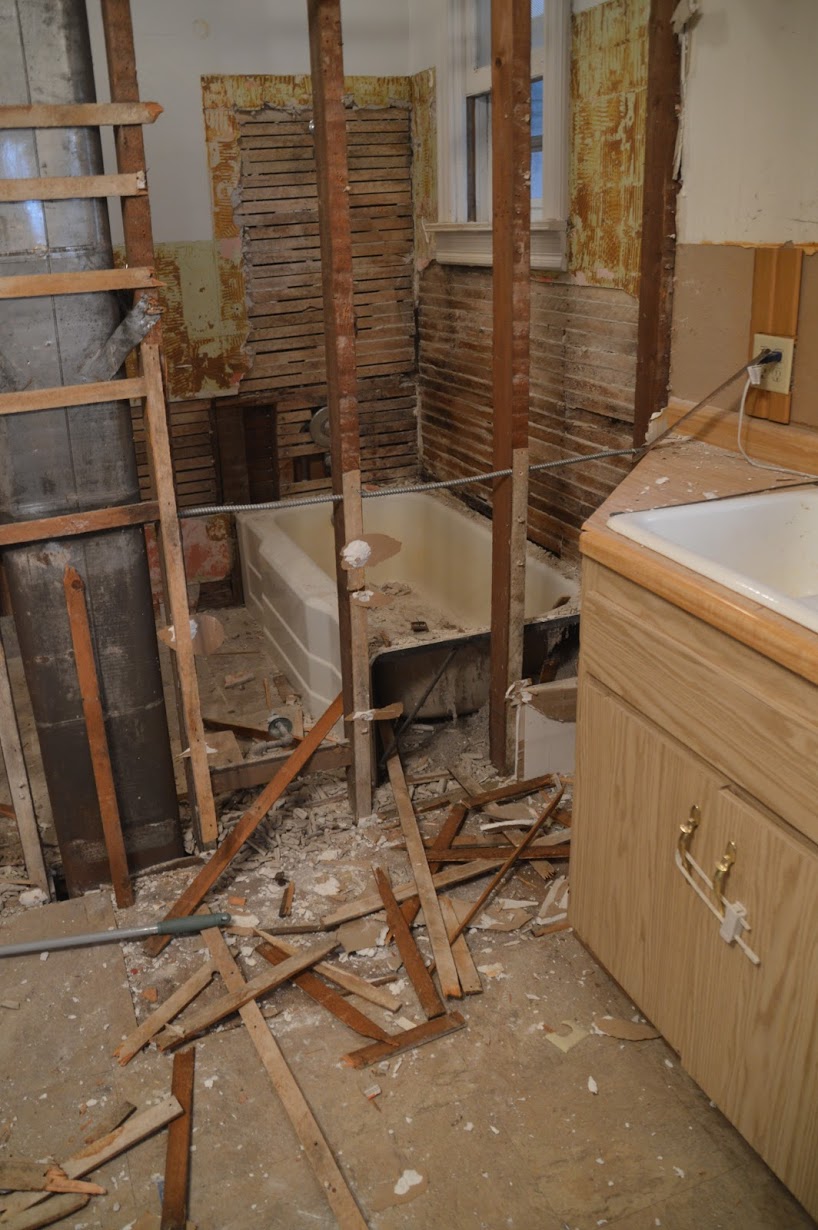
We gutted the bathroom, and boy did that take forever. The tiles on the walls were really hanging on there good. All of them had to be chipped off, one by one. The bathtub weighed about 9000 pounds so that was certainly a challenge to get it out of there. It was pretty terrible when my husband had it on the back porch, on a dolly, I thought for sure it was going to break the 125 year old porch floor. One by one he got it down each stair and out of the house. It definitely laid in our yard for a few weeks in the same spot, right off the back porch, about halfway to the dumpster we had rented for all the garbage. It was extra white trash. The dumpster we had was red, and since this was in December, we really considered white trashing it up even more, and decorating that giant red dumpster with Christmas lights. We’re cool like that.

Thank you snap chat for the fact I snapped this to someone and saved it
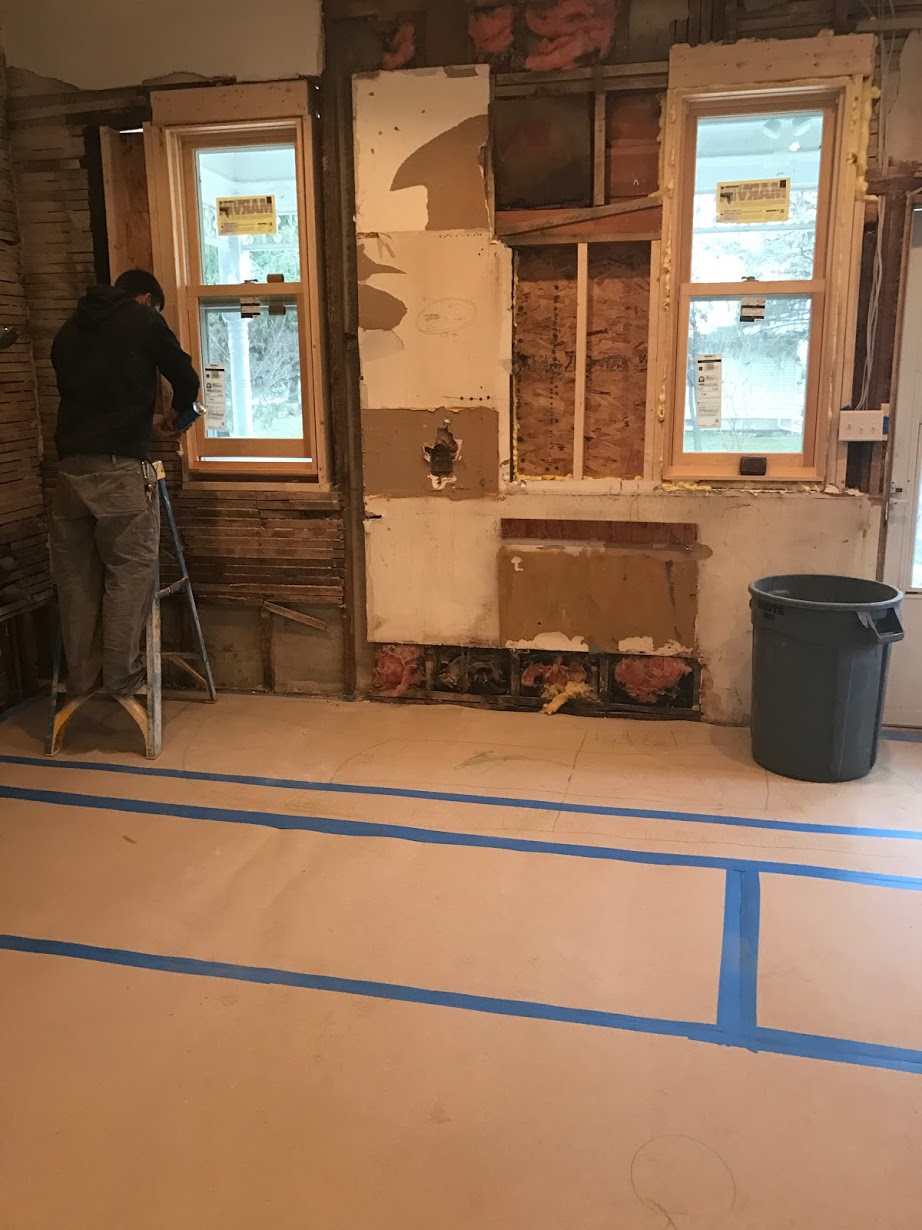
All men are happy on demo day
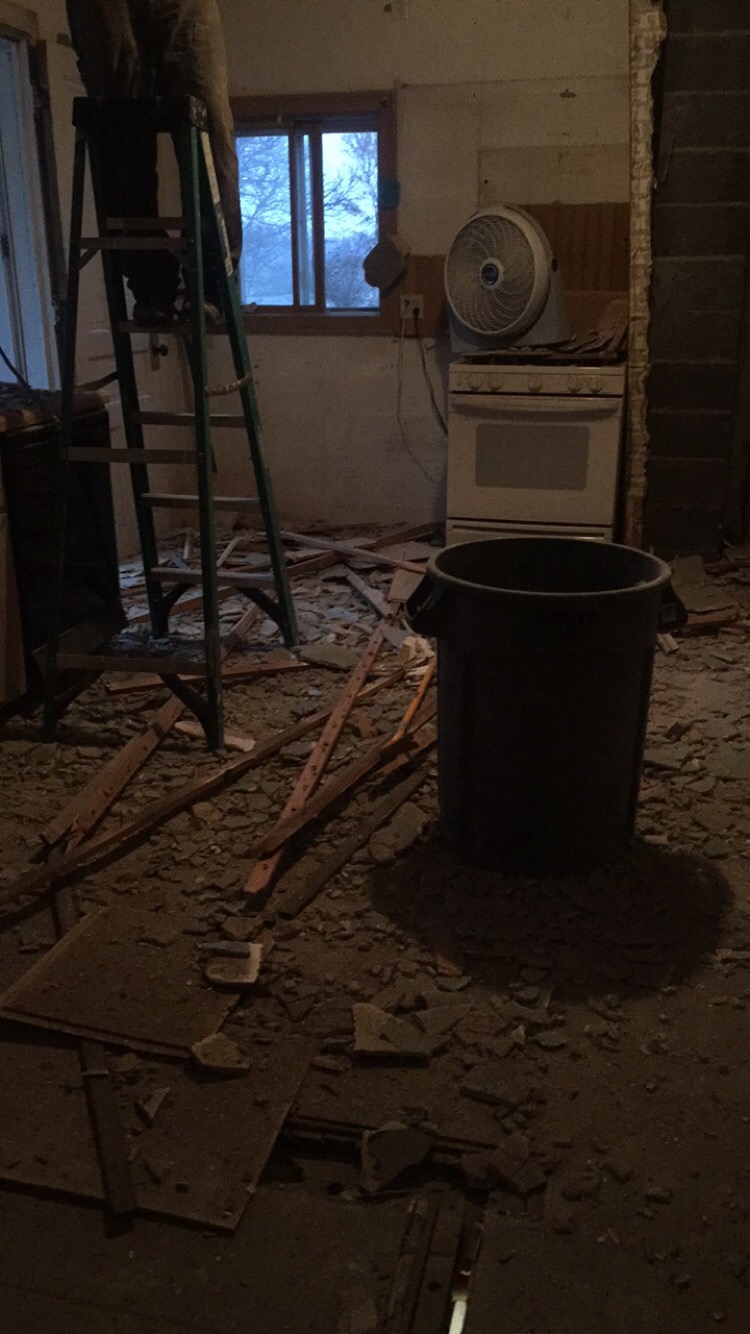
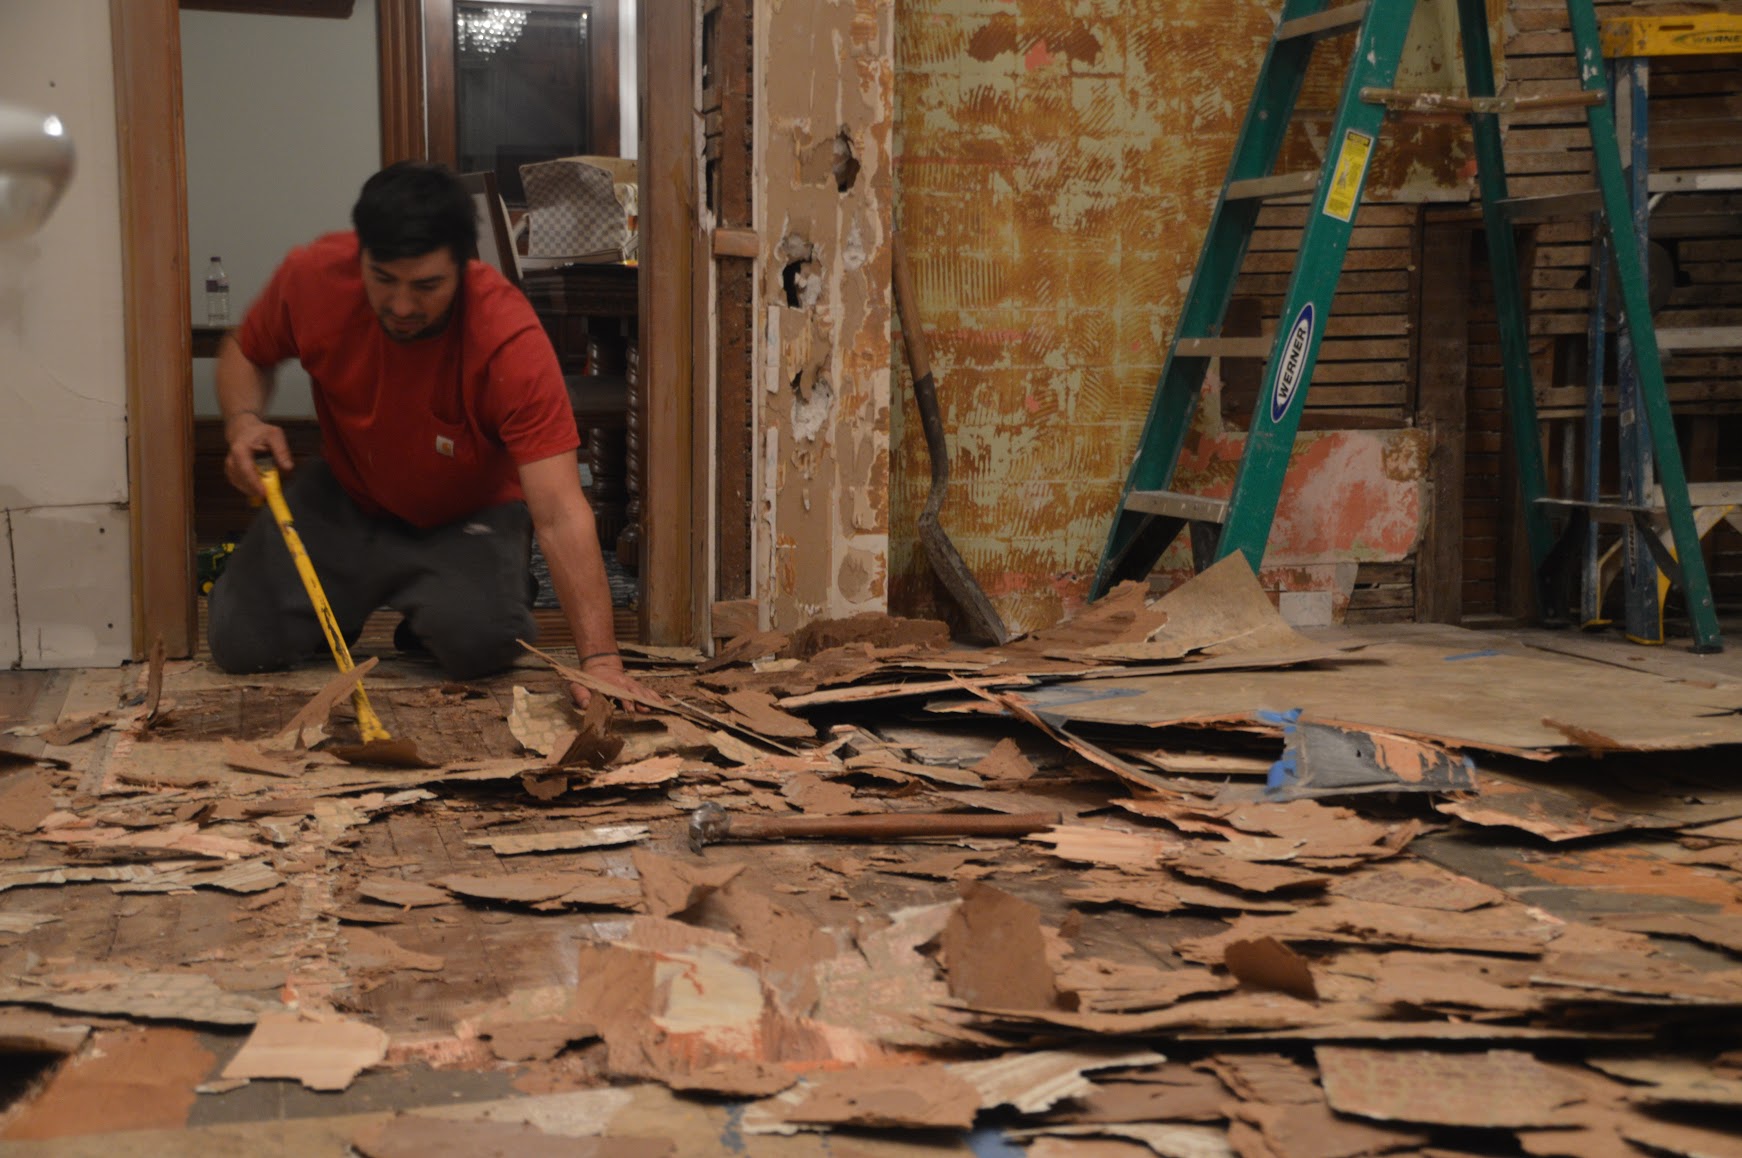
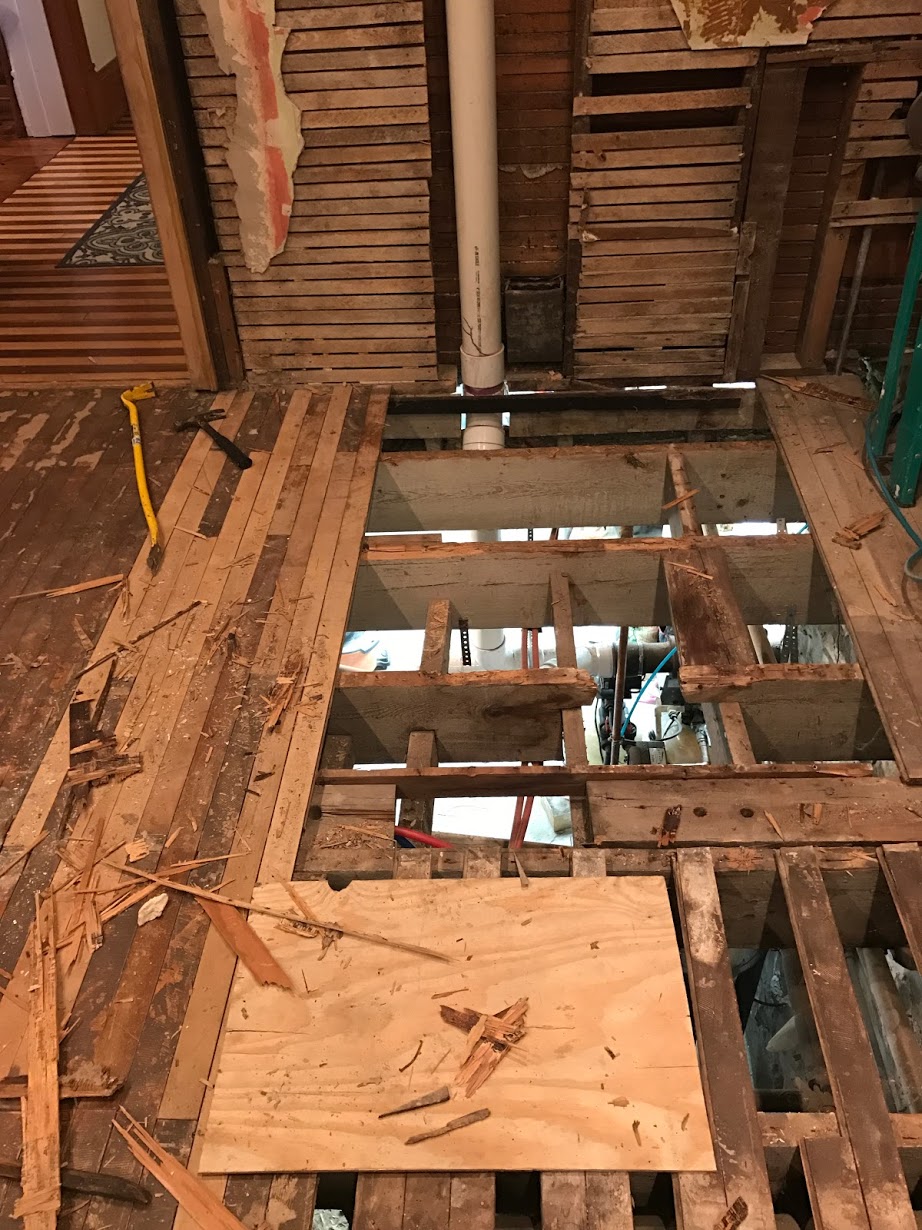
After the bathroom was gutted, the bathroom floor revealed that the hardwood had been removed. The area it had not been removed was under the bathtub, and it was SO rotten its hard to believe I didn’t fall through the floor while taking a bath. I take baths often and I really don’t hold back on how much I fill the tub. It was horrifying to see the wood rot under the tub, to the point that it wasn’t even safe to stand on. Gutting goes on, wall dividing the room comes down, plumbing and electrical has to be moved. This also left behind a large hole where the toilet was, which was safely covered with a chunk of plywood. It stands out in my mind warning our nanny not to let our 2 year old go near these holes. Totally safe!
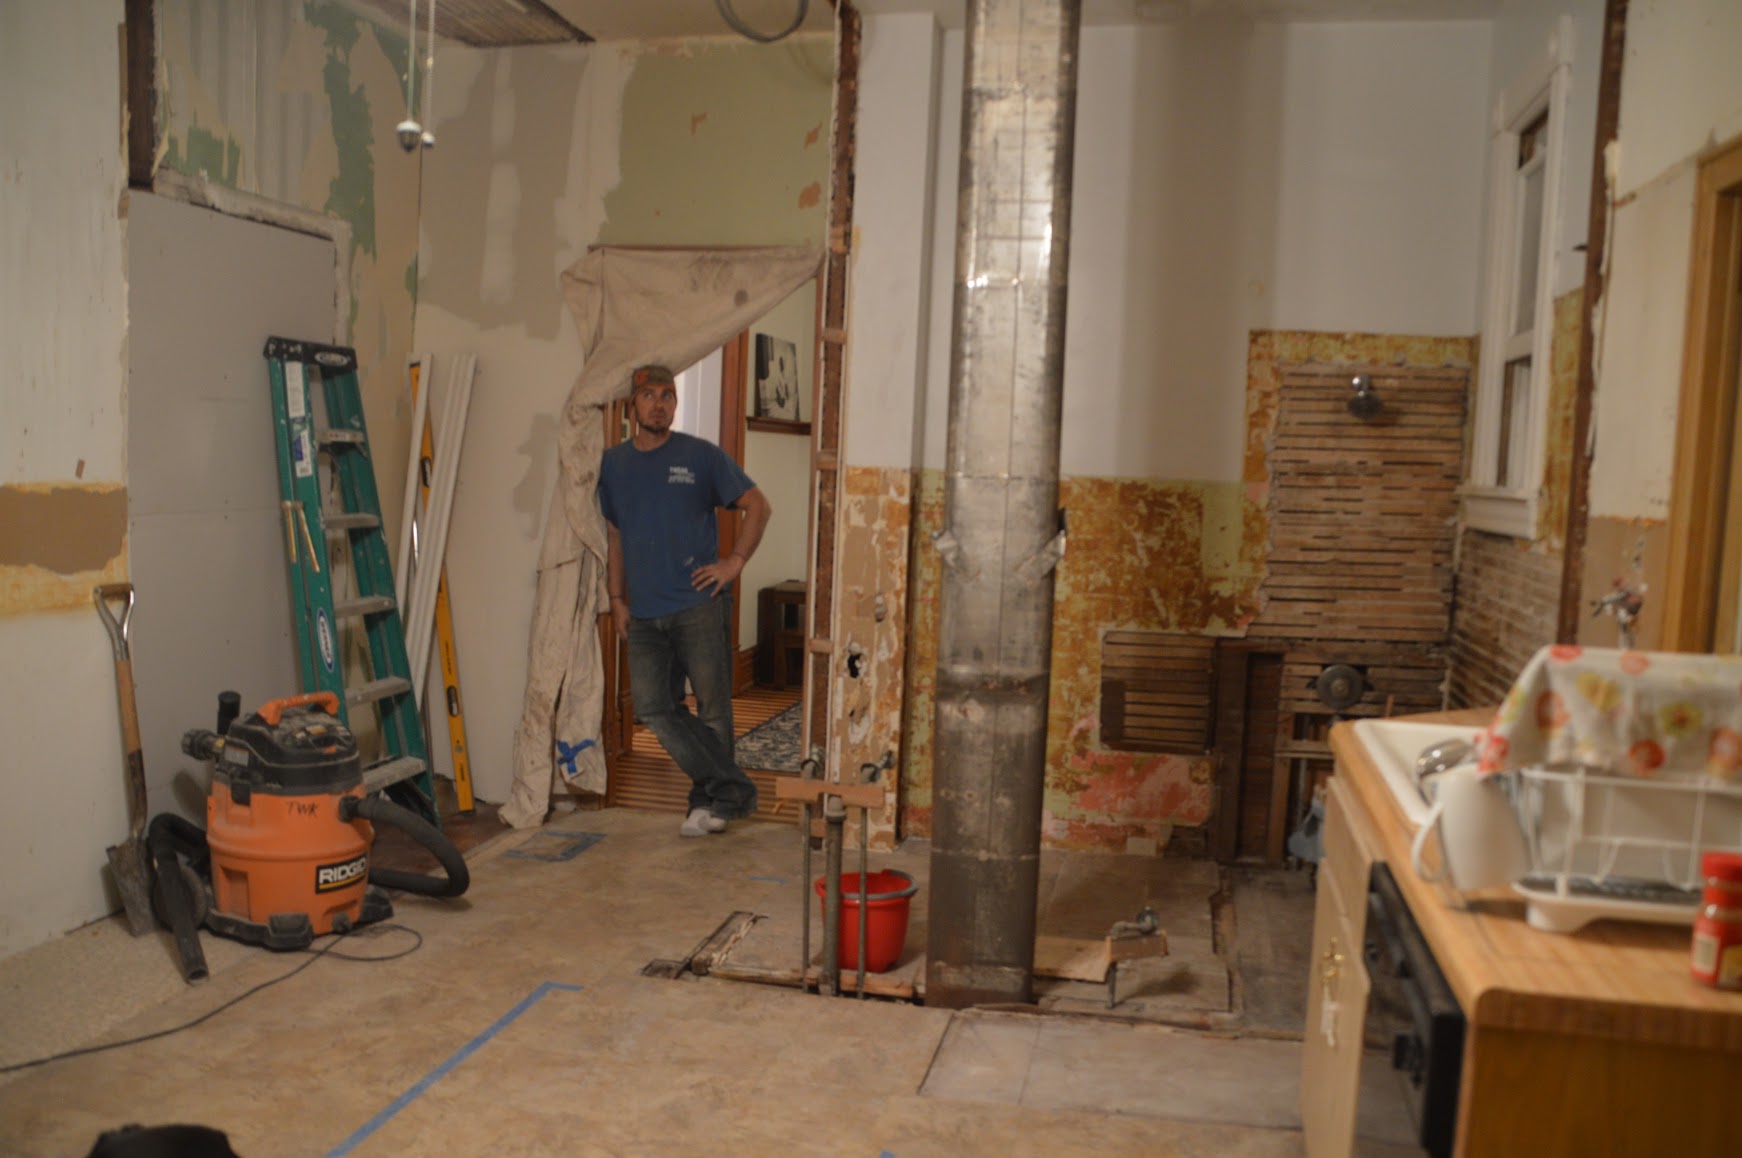
Notice the boards over the holes of large holes to the basement
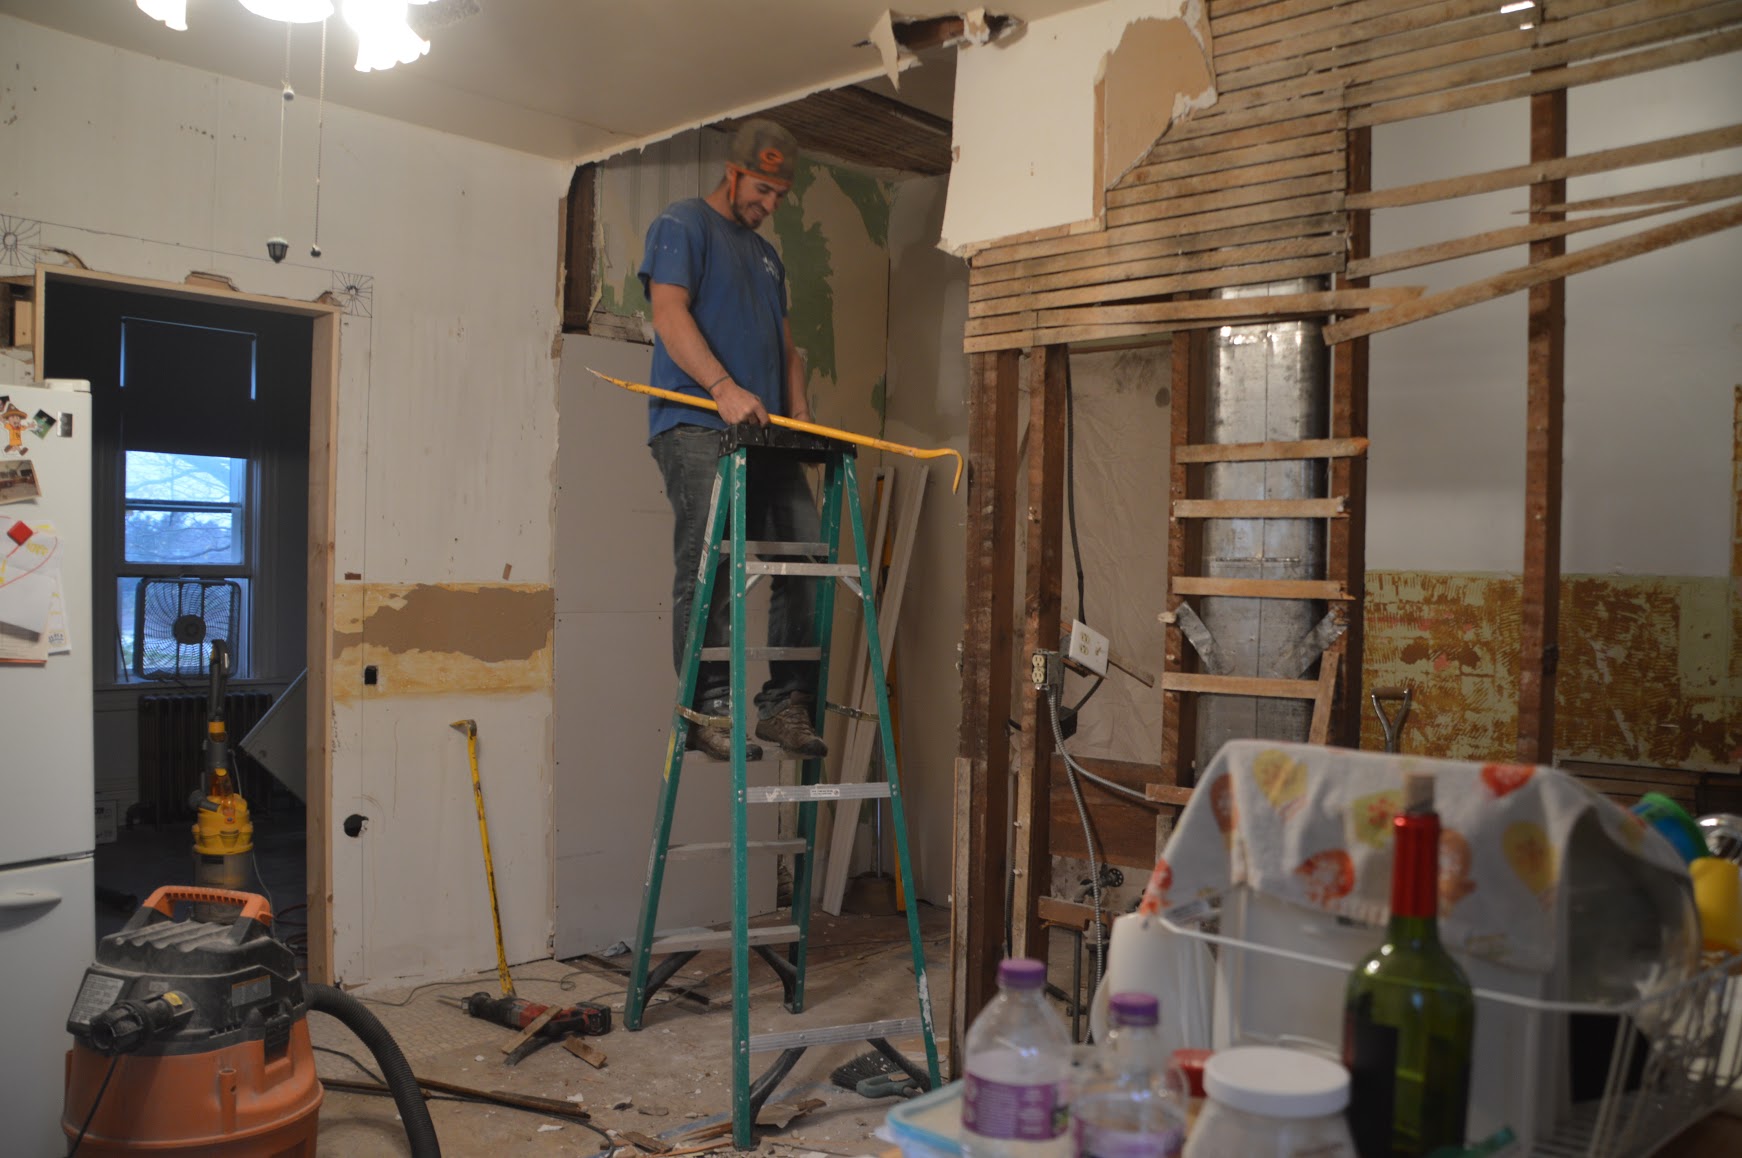
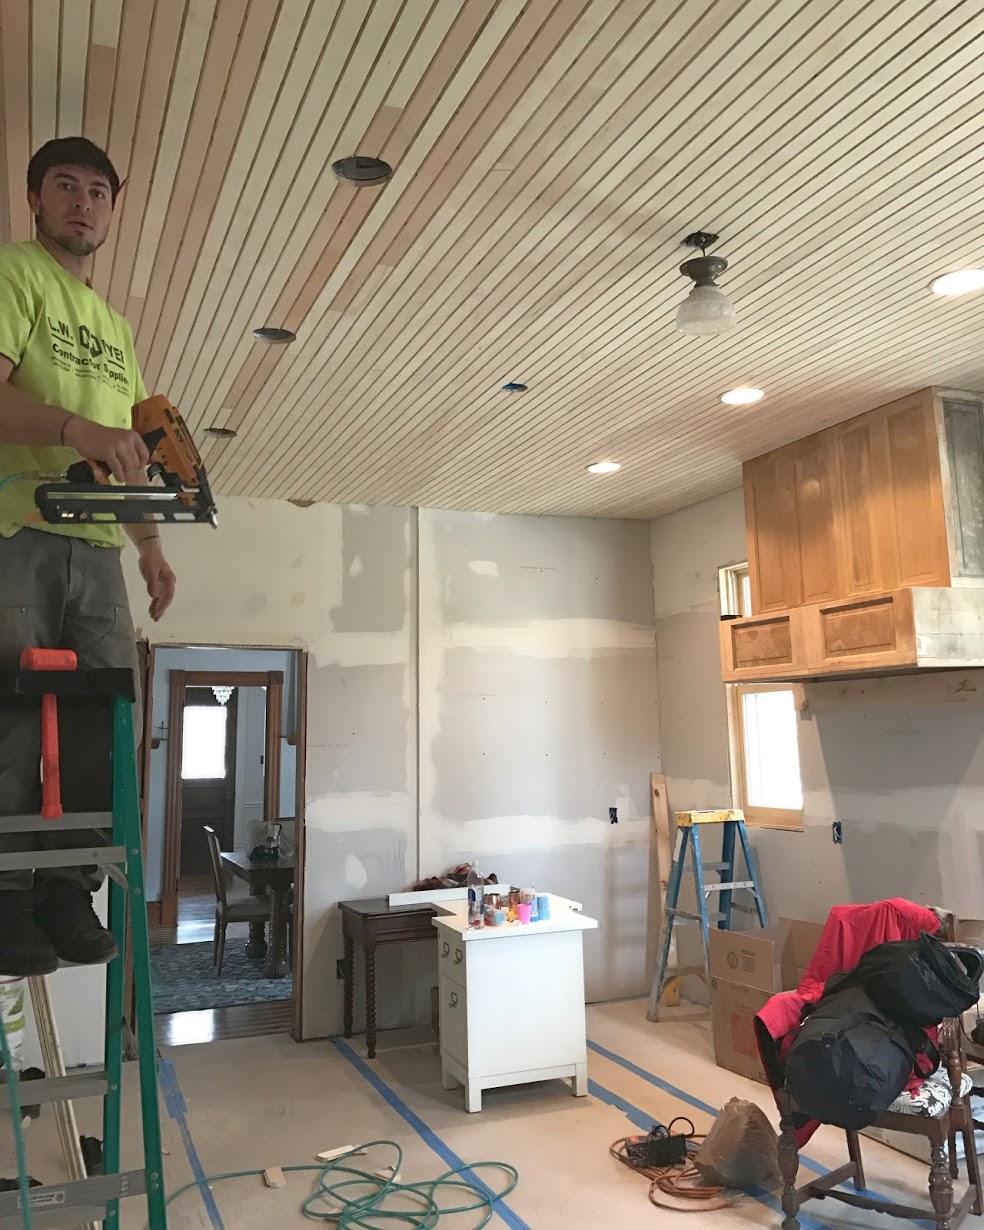
We continued on with our gutting, and next worked on our VERY dropped ceiling. One of the comments most people say when they come into our home is how tall our ceiling are. The kitchen was not the case. Dropped ceiling galore! And let me tell you, that was a very well constructed ceiling. They did not hold back on nails, beams, support, drywall ECT. It was really hard for Travis and I to get it down, and since we’re a two man show most days, I also almost died doing this with him. Nothing like a crashing plaster ceiling complete with 10 foot beams underneath, trying to end your life. Four dead mice skeletons also crashed right out of there. One of the things that really bothered me about this kitchen pre gut was that I always felt it had a bad smell. No matter how much bleach or cleaning I did, it never smelled clean to me. Unfortunately I suffer with this curse of a SUPER strong sense of smell, and it always bothered me. I’m pretty sure the first things out of my mouth in ALL circumstances is “What smells? Do you smell something? I swear something smells in here” Well, here’s the answer. Rotting dead mice in the ceiling. My nose never fails me. Super fun. Removing this ceiling also revealed one of the reasons why they covered it up in the first place. Very damaged plaster. We have managed to restore almost all the plaster in the home on the spaces we’ve worked in, but this ceiling was a goner. So you can imagine the amount of dust and mess we made when we removed the dropped ceiling and the beams weren’t there holding up the plaster anymore. It was a NIGHTMARE!
The only pic I have from when the plaster was crashing down. Shortly after I almost died when the entire wood structure came falling
We cleaned everything up as best we could. Bagging up plaster really sucks. It’s super heavy, and so so dirty. We pretty much filled the whole dumpster with bags of this plaster and dead mice. Atleast that’s how it felt at the time. The dead mice I believe died long before we lived here, as they were legit skeletons. When we moved here we discovered a rat poison green chunk of death hidden behind the washing machine. We removed it immediately. Of course that isn’t safe for our dog or children but who the heck thinks this is a good idea. You do realize the mice eat the poison and then go die somewhere right? Not like “hey guy, lets go back outside, I feel dealthy so I probably should leave and take a nap outside.” No! They crawl into a dark crevice of your home never to be found, rotting away. Blows my mind people use rat poison for pest control.
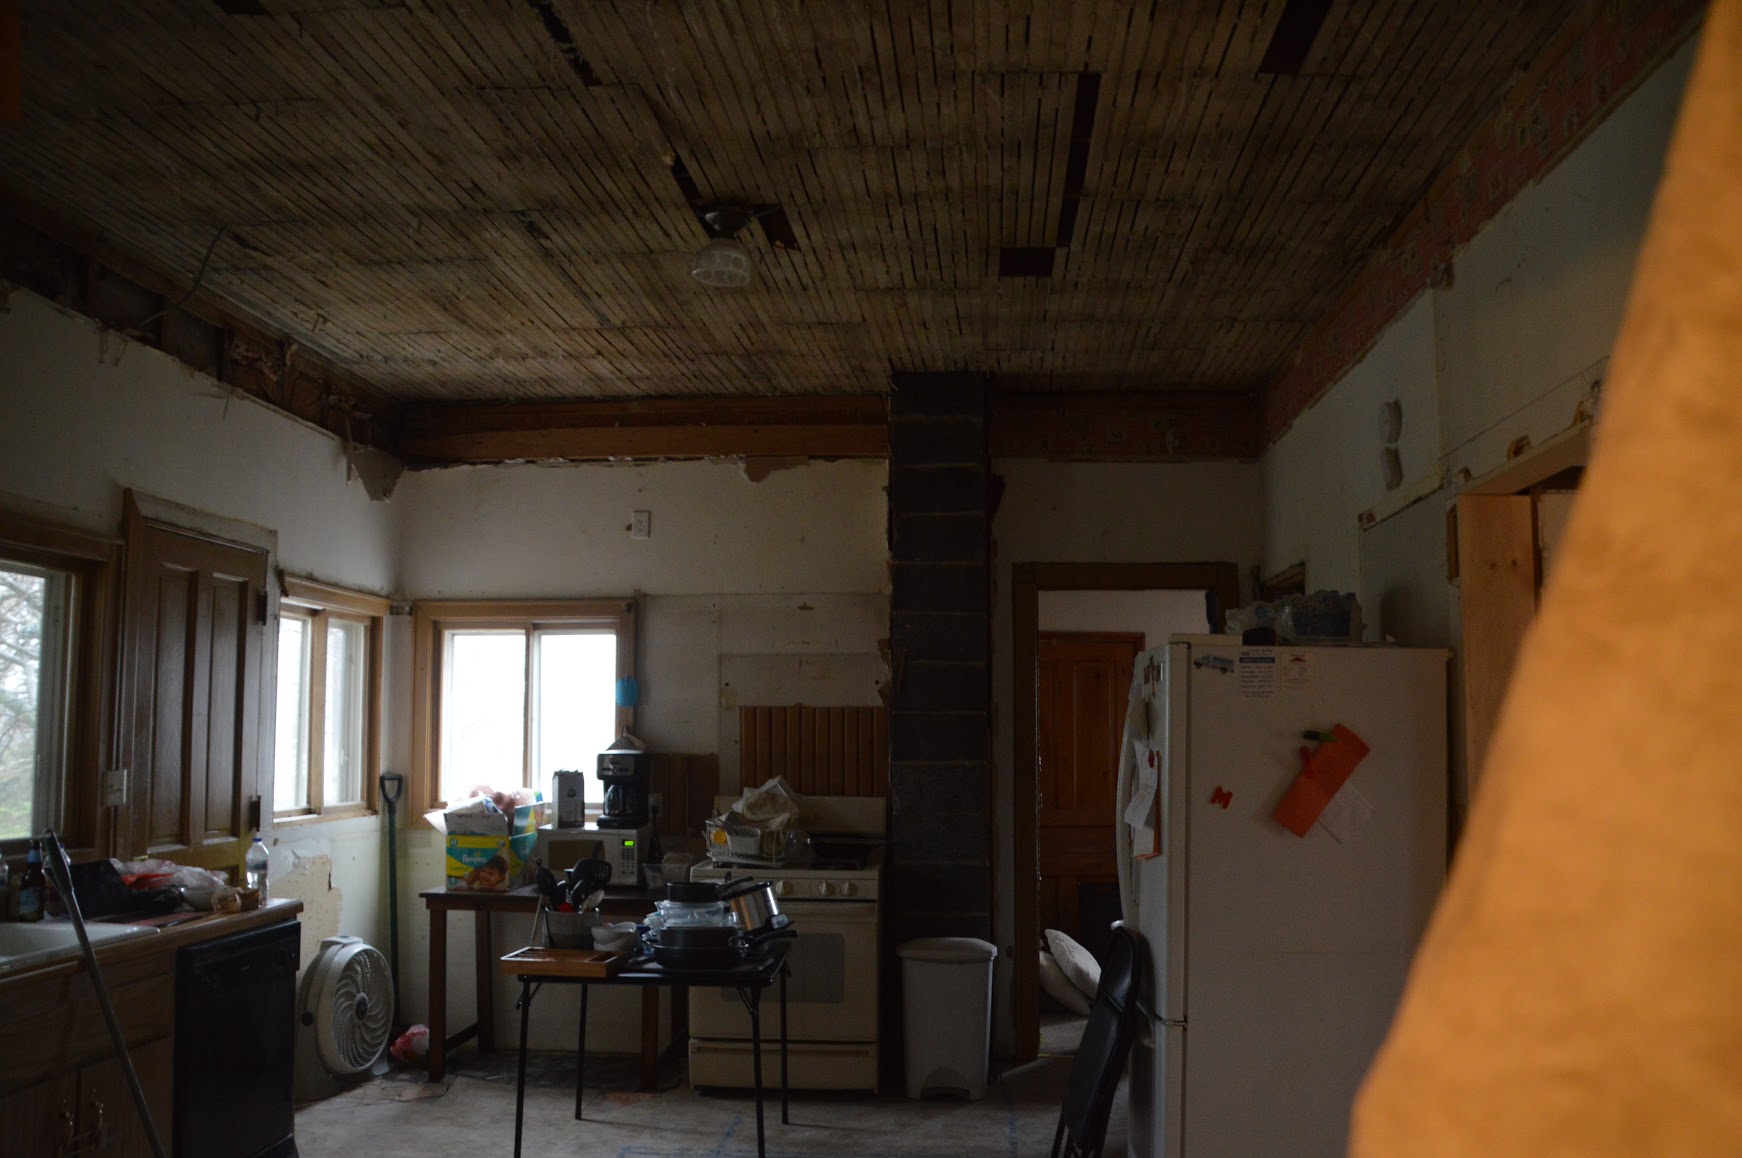
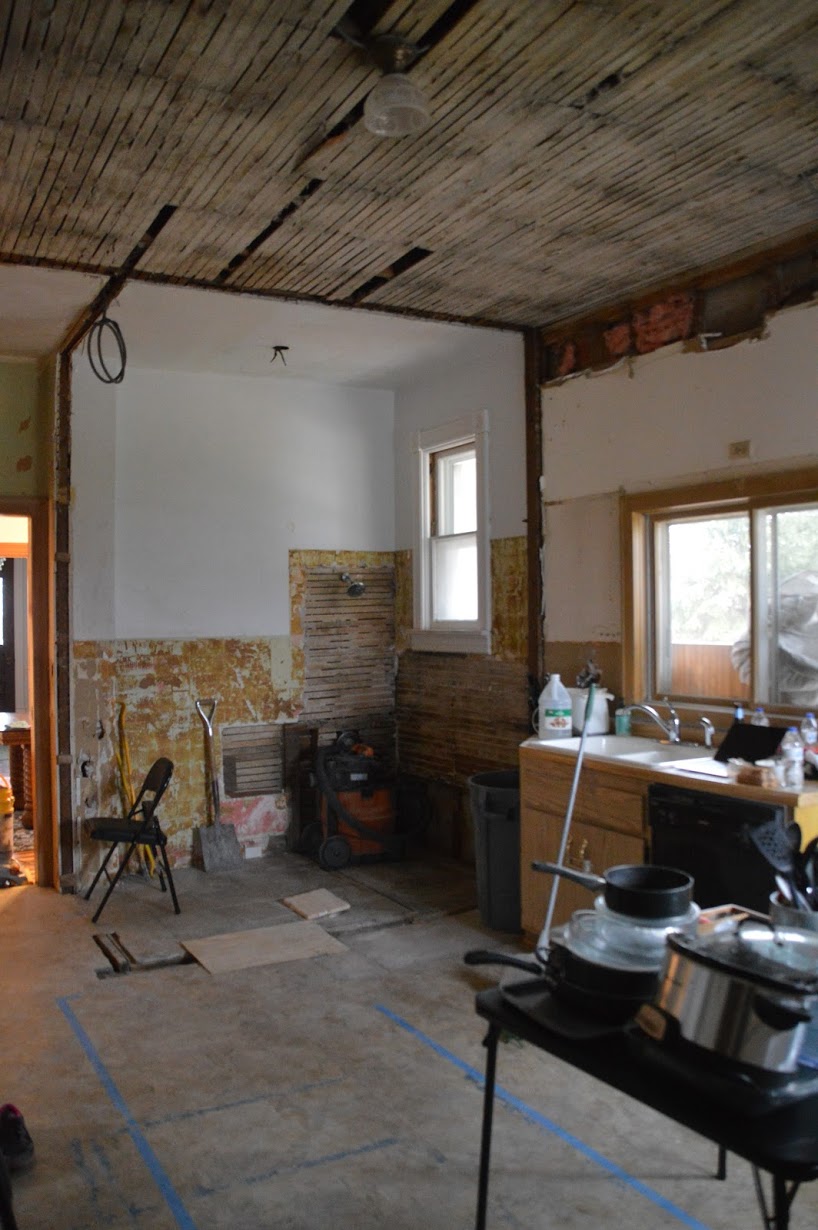
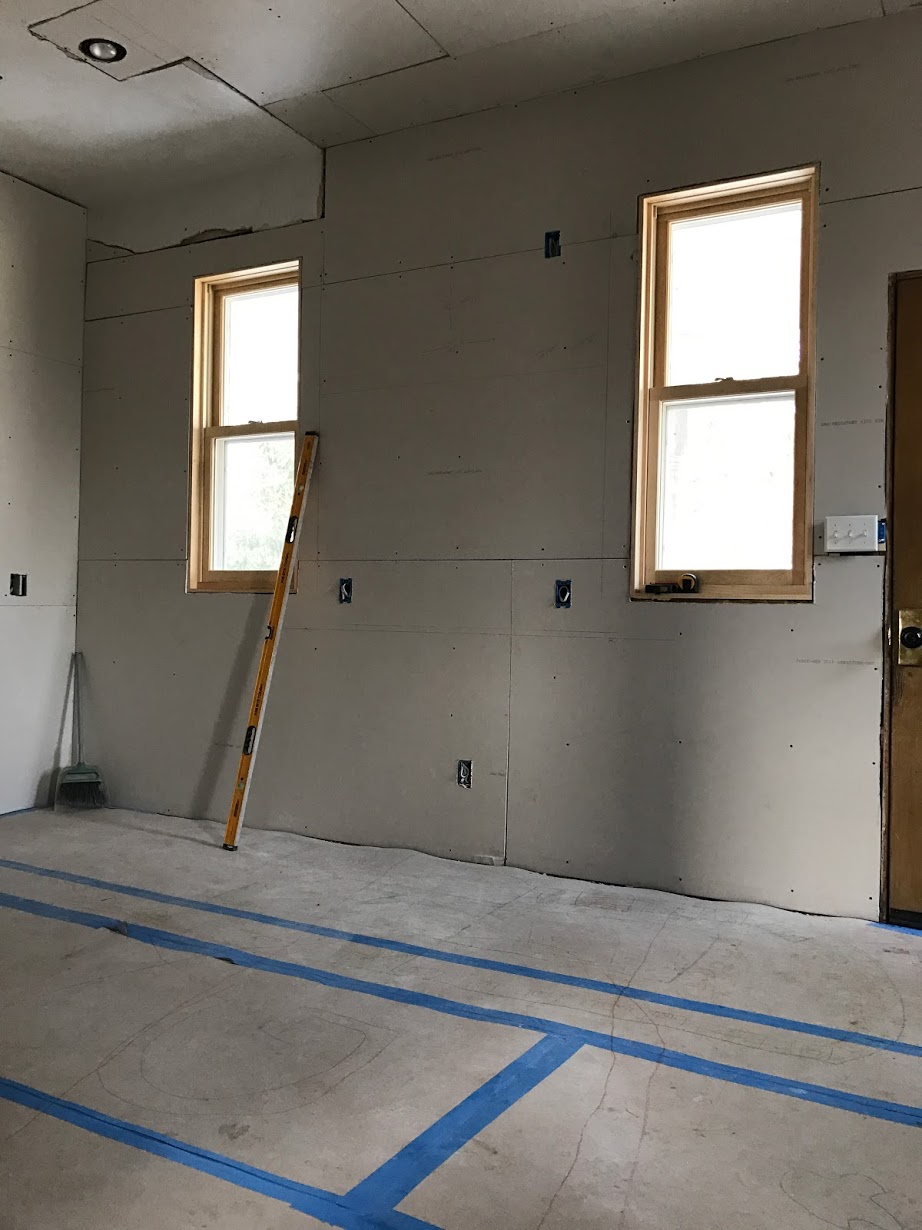
It was a real challenge when the dropped ceiling and plaster had been removed, because what was left was the plaster lath. Above the lath and in-between the lath was blown in insulation. It very often fell out of the ceiling, into any food I was cooking. I mean, we were still living there and did have to eat and cook as best we could. Our stove and sink area stayed in the kitchen as long as we could tolerate, and we had a small card table with our microwave on it. I remember it mostly when I would use the stove, as the heat would rise, and I would look up and see all the little blown in insulation particles blowing in the heat wind (heat rises obvi) and then falling out everywhere. Of course I was mortified and losing my mind, so thankfully the recessed lighting was quickly completed and the ceiling was closed up with nice new sheetrock.
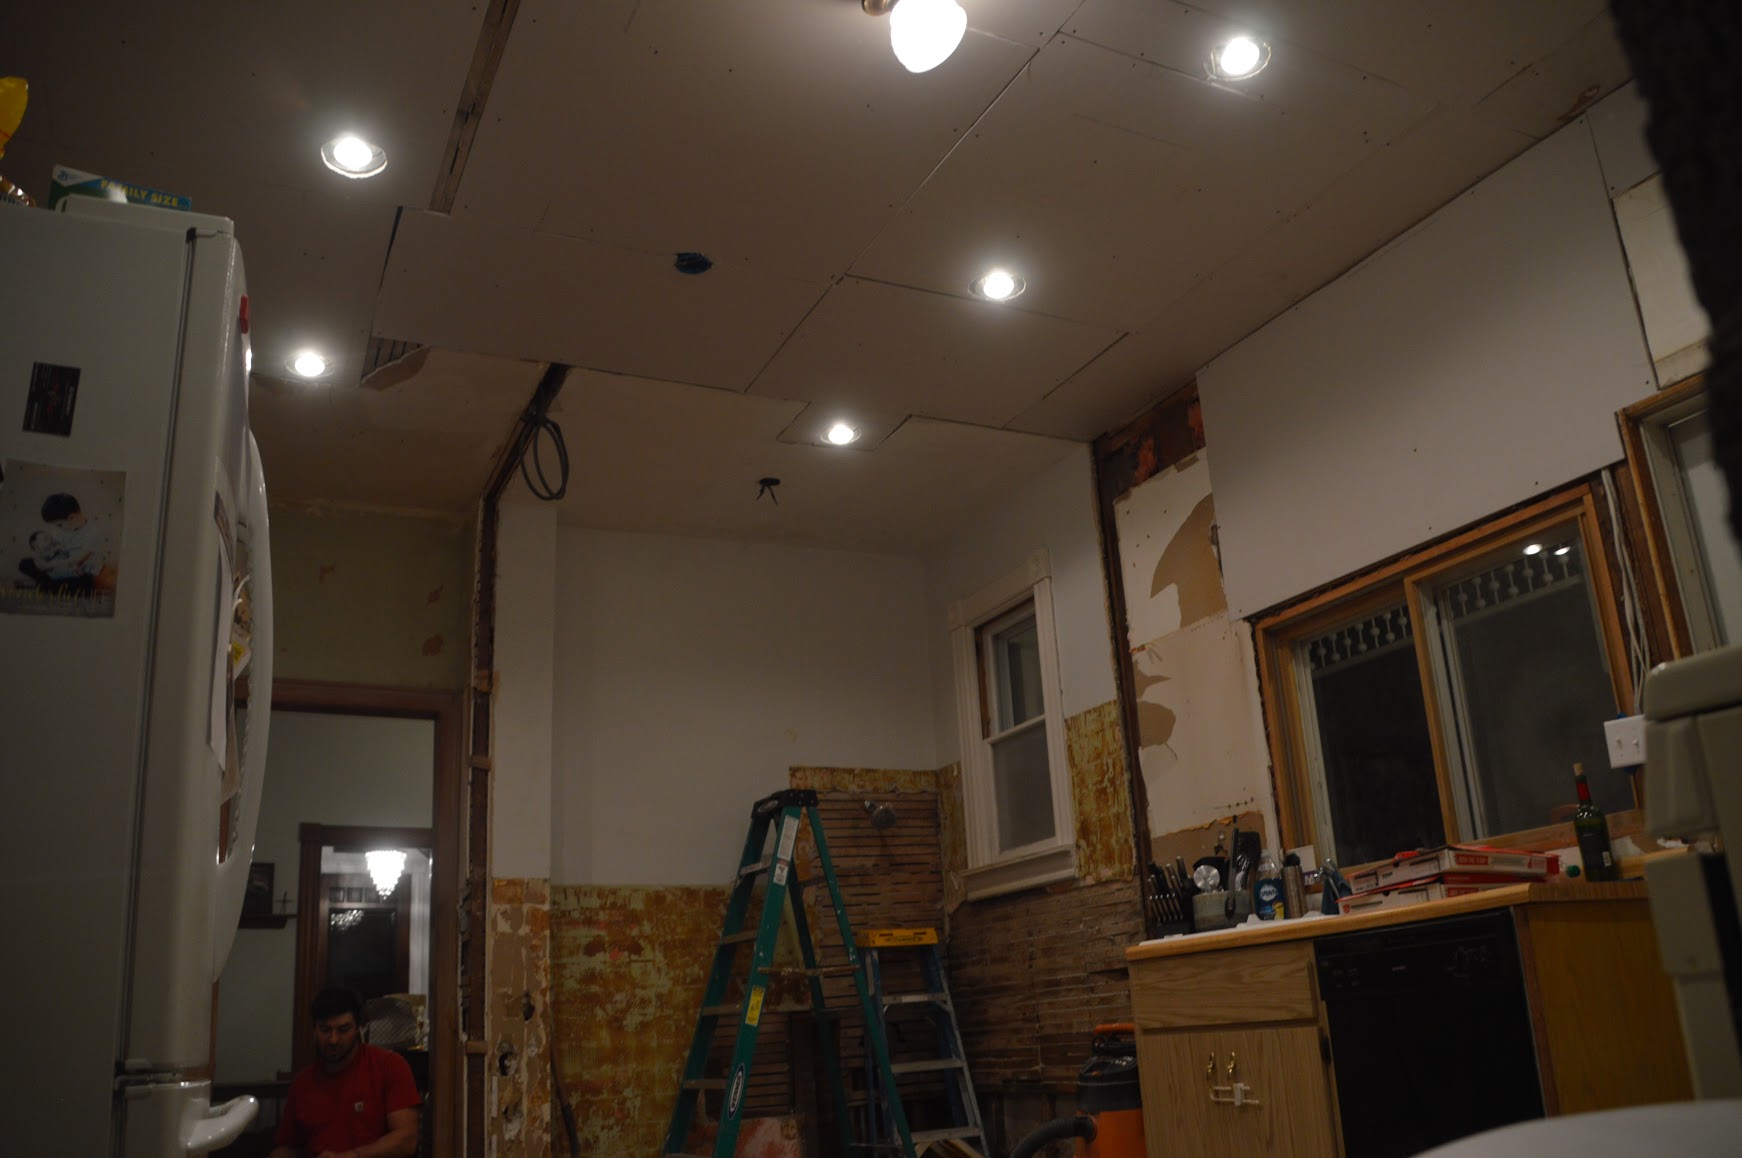
Hello closed up kitchen ceiling and new lighting
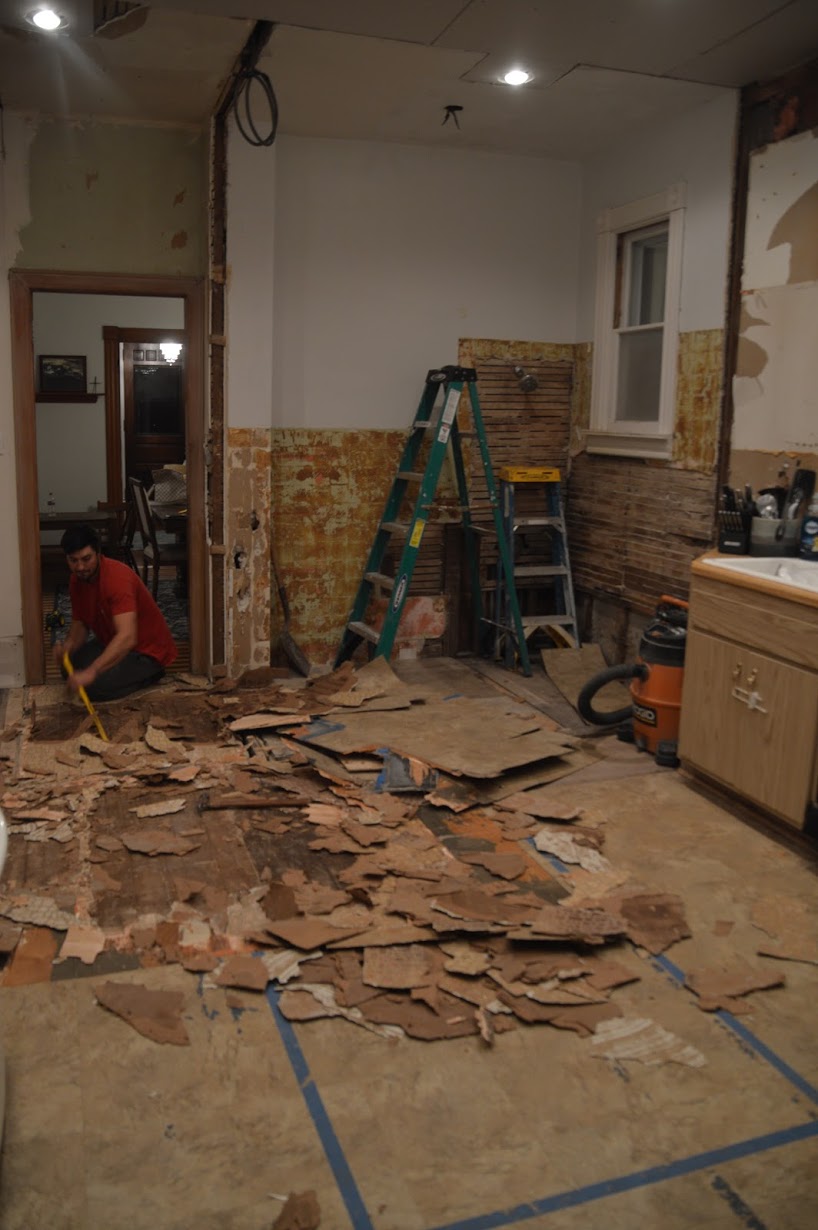
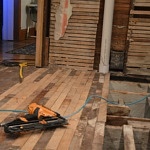
Last but not least in the gutting department, was the floor. This floor was no different then the pattern of many layers in this home. We had multiple layers of linoleum in here, on top of black tar paper, on top of black glue, with about a million staples to pull. It was super fun. On New Years eve (we started this kitchen remodel in November, so about 2 months into this process) We worked really hard on scraping the floor and pulling all the staples, and then feathered in a large patch where the bathroom wall and original hardwood floor had been removed. The salvaged maple floor came out of the bathroom we have our clawfoot tub in. Unfortunately when we were working in that bathroom and removing all of those layers of flooring, we discovered lots and lots of rotten maple boards. Thankfully we could salvage about half of them as we knew we’d need them in the kitchen when it came down to it. So, Travis worked hard to patch in that missing section of our kitchen, and you’d honestly never know any of it was there. It turned out beautifully.
Yes that is straight into the basement you’re seeing
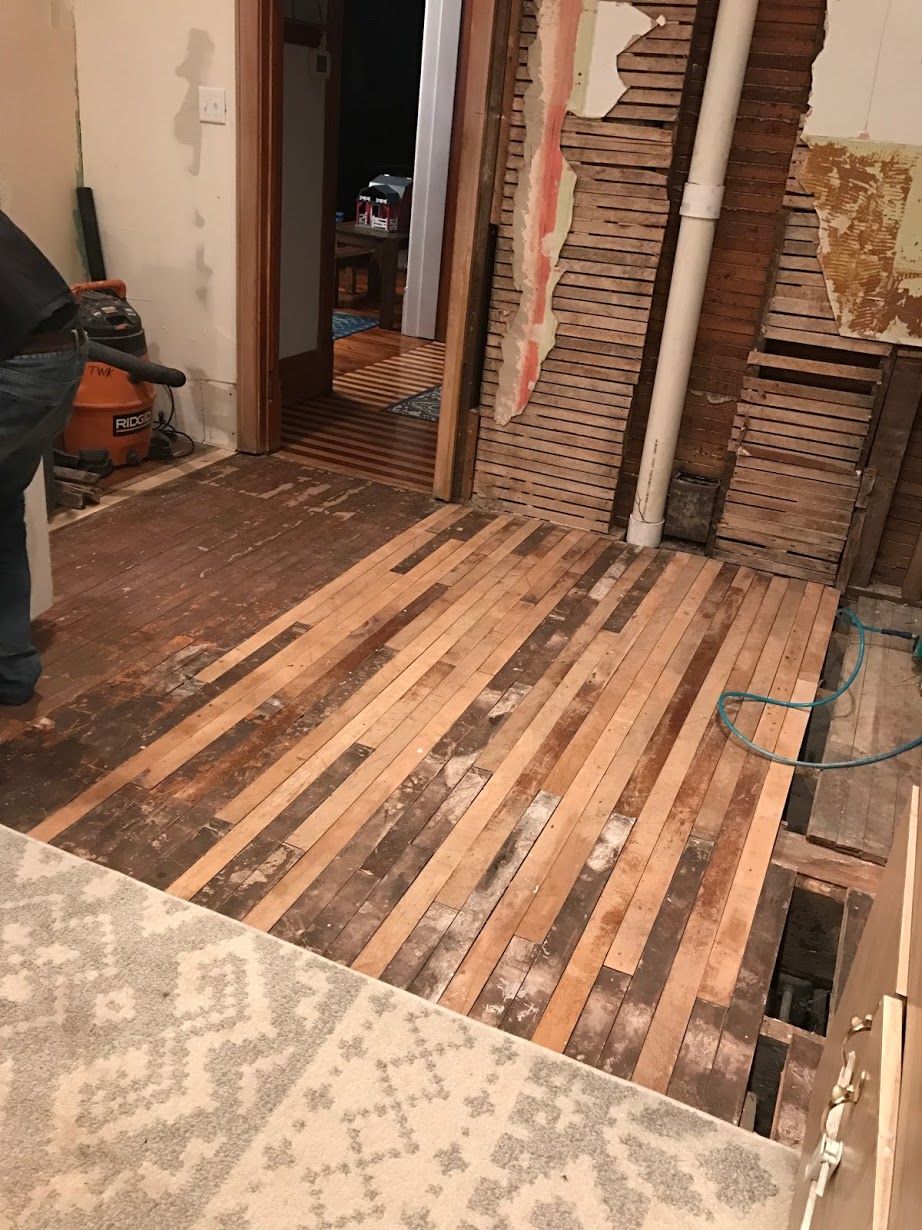
Here we have with this magnificant patchwork, the great state of Florida left on the wall in plaster
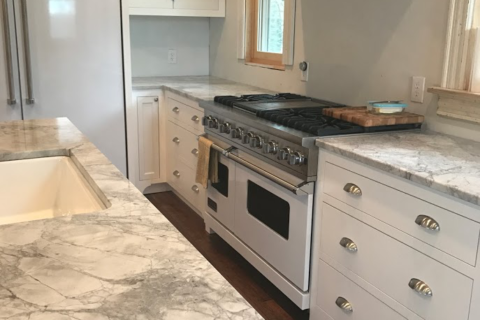
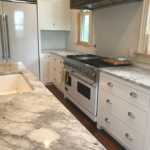
So onward we went with getting the floors completely prepped and the room completely emptied. This indeed meant removing our kitchen sink which also translates to the worst part of the kitchen remodel. This was honestly the hardest part. Chad our floor guy was coming in January to refinish the hardwood floors while we took a very needed vacation to Punta Cana with our kiddos, as this was their Christmas gift from us. (Experiences vs stuff is where I’m going with my parenting skills!) . We wanted to coordinate our vacation so we stayed out of Chads way. But the kicker on this one was that the cabinets were not going to be completed until April. April sure felt far away when it meant no sink for four months. And it was. It was absolutely the worst part and probably why I am damaged goods forever when it comes to being on this journey! The good news is, the vacation was wonderful and we were equally excited to come home and see beautiful, clean floors. They were absolutely perfect, and it really helped with the sanity of all the dirt and grime.
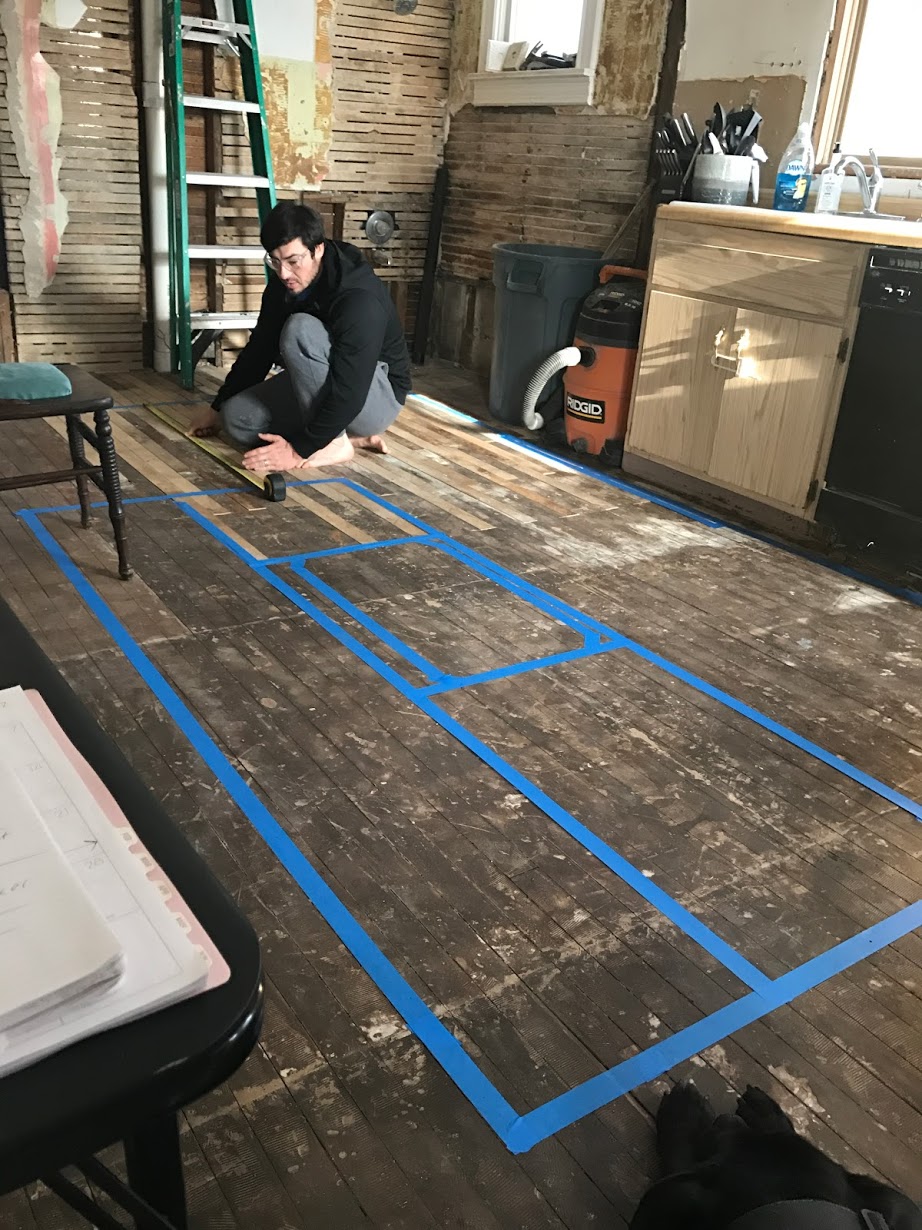
mapping out the island for a visual
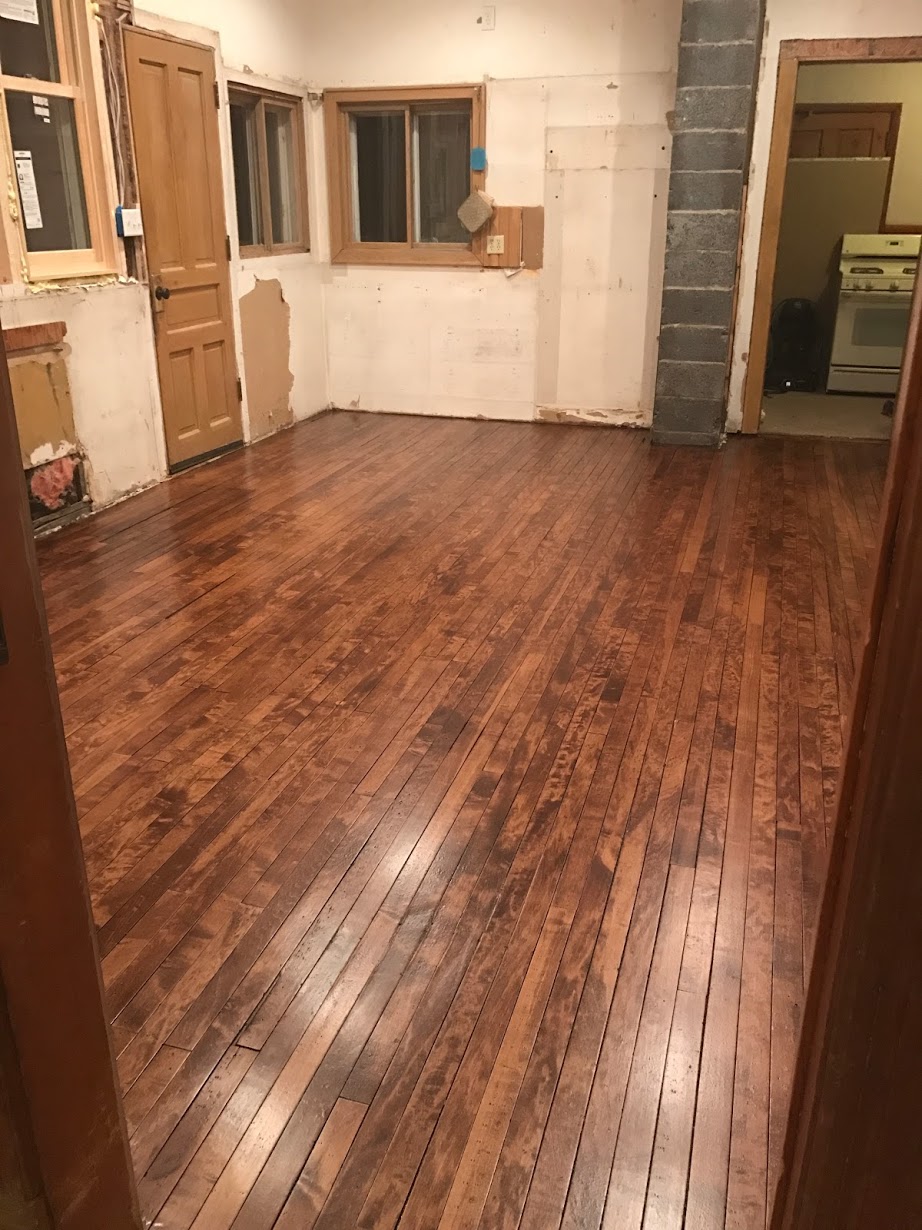
The floor reveal. Fresh off the plane. These were just the best thing ever to come home to.
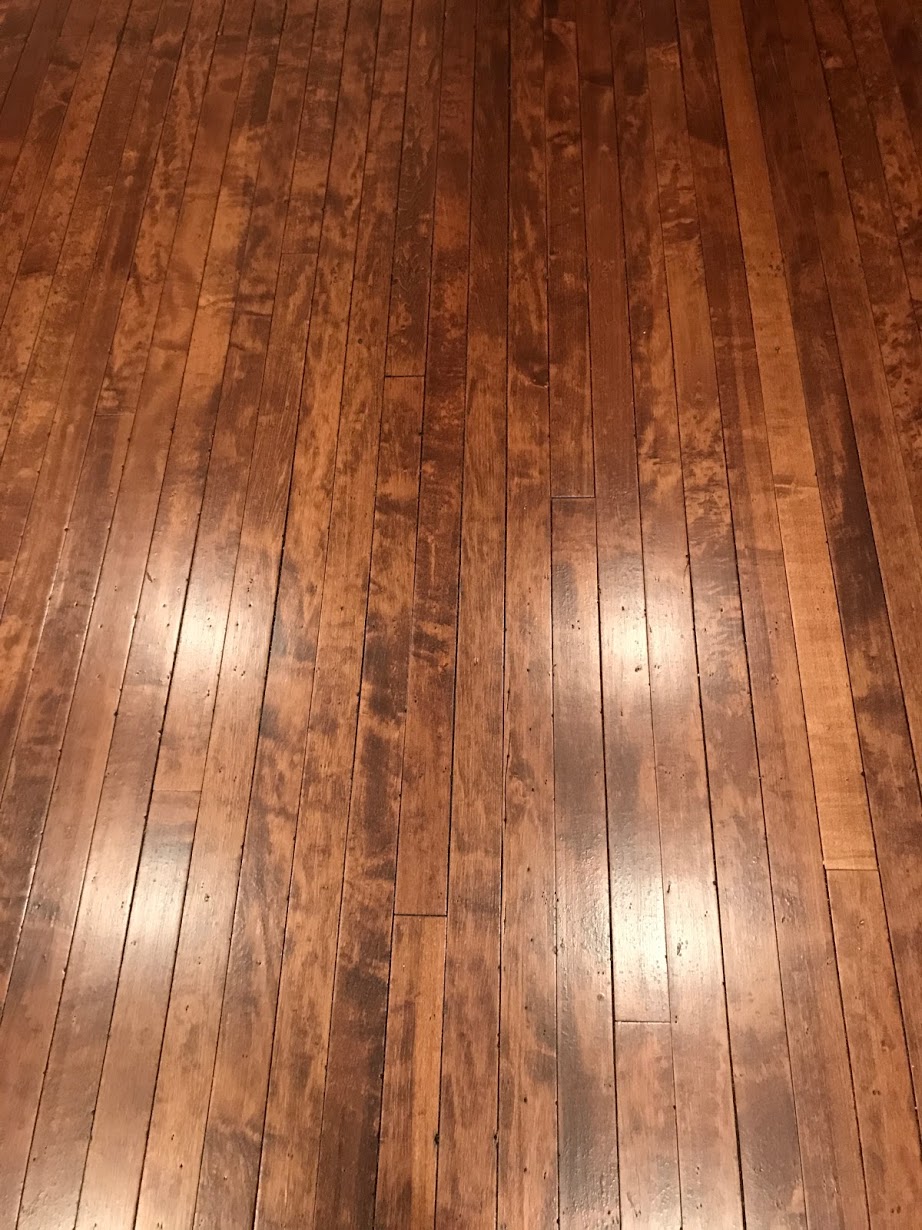
Any floor can be saved!!
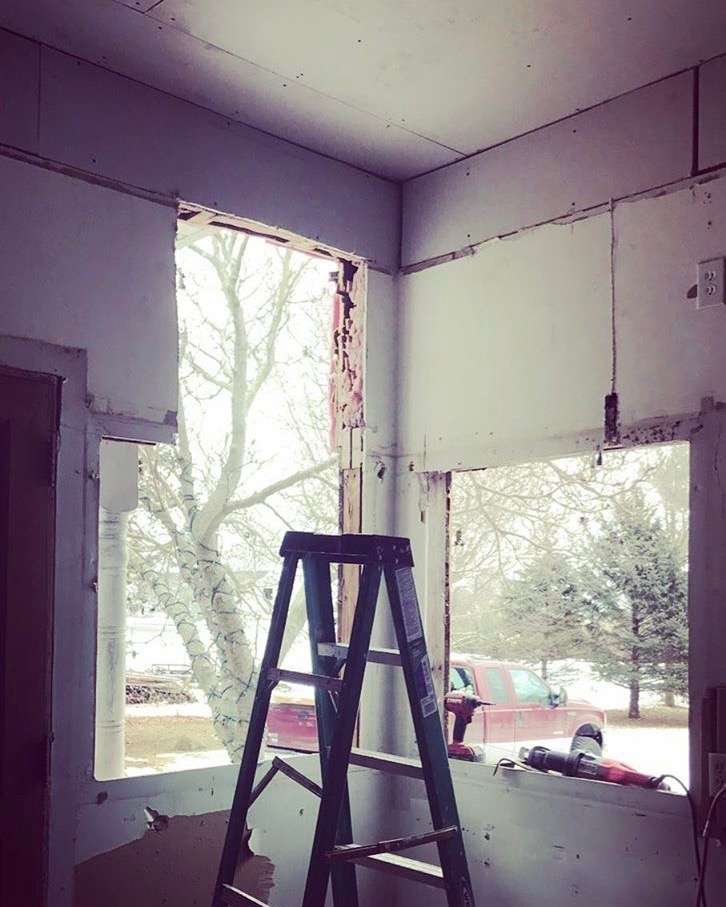
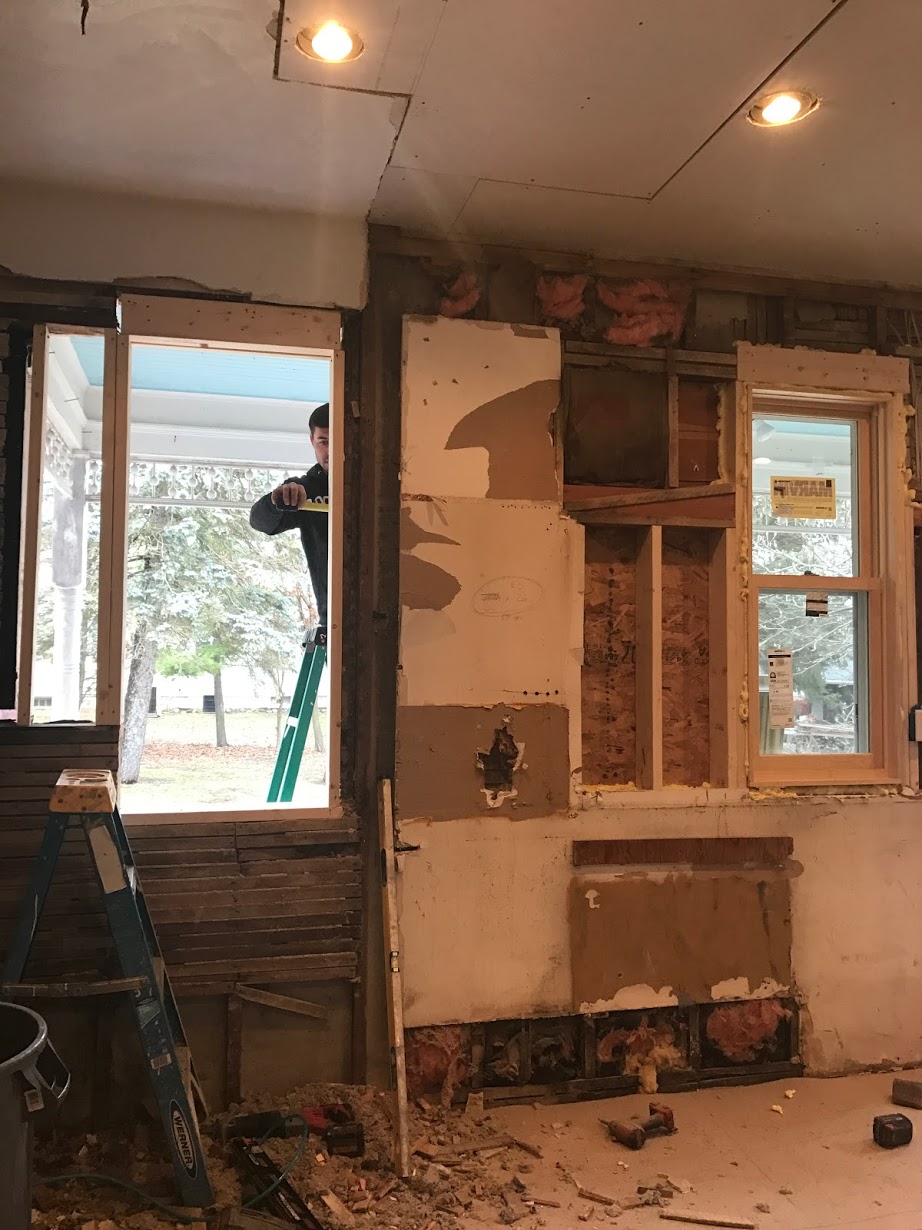
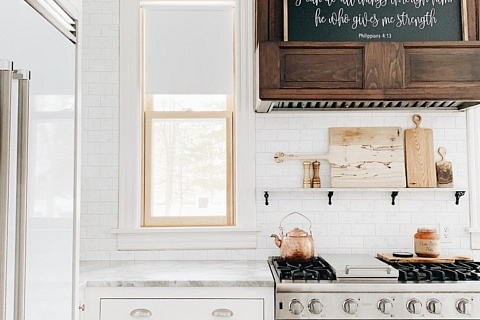
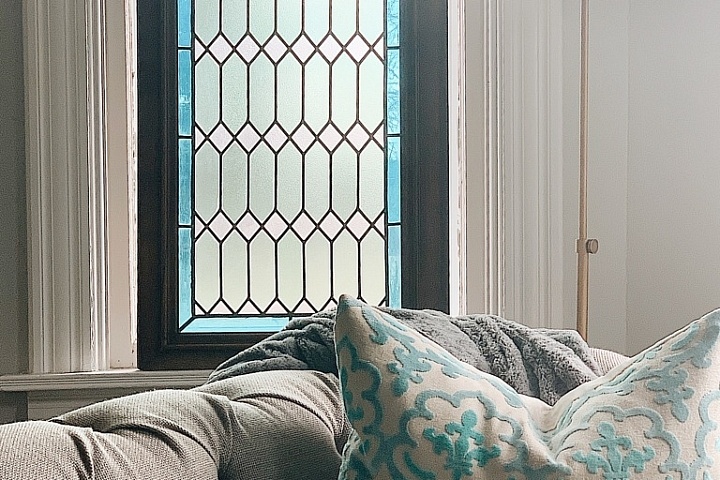
Onto the kitchen windows Travis went. Let me just tell you, new custom windows that match the rest of the house are insane to purchase. Cost wise that is. We went with Marvin windows and they are amazing. The kitchen is the only room that had the original windows removed. I believe the previous owners put smaller windows in, to accommodate the dropped ceiling. You can imagine when we removed the dropped ceiling that their ”new” small windows, felt extremely low considered they now had about 6 feet of wall above them. It was very off in the proportion department. So like any other thing in this home, Travis removed those new old windows, one by one, and installed the new windows. This was no easy task considering the new windows were so large compared to what was currently there. This meant removing the vinyl siding from the exterior, removing the original clapboard siding from the exterior that’s underneath, (which we fully plan to reveal and restore someday) and cutting a very large hole in the side of the exterior, in January. Let’s not forget we live in Wisconsin. It was definitely snowing during atleast 3 of the 4 window installations. So, repeat this process four times. It took, FOREVER. He did these while I was working, per usual. I’m pretty much a head case during all stressful situations so my husband has learned to do the stressful things while I’m gone. Otherwise I’ll likely be pacing the house with severe anxiety, questioning everything he’s doing, and likely having very irritating questions. (gosh I sound like a real treat). It’s not because I don’t trust him and his abilities, I just like to learn as he works which translates to Stephanie acting like a 4 year old with a million questions. I can imagine this does not make an already difficult process any easier. A major design component of this kitchen was that I wanted our range and hood vent to be the focal point of the room, Perfectly sandwiched between the two of the new windows. That also meant that they looked proportionate from the outside for the exterior. Travis of course, nailed it. I really do realize how lucky I am with having this man as my husband. His skills and abilities are unbelievable and I am forever grateful for his hard work.
I Spy a Large G on the floor, for Green Bay Packers of course. Compliments of the children who live here.
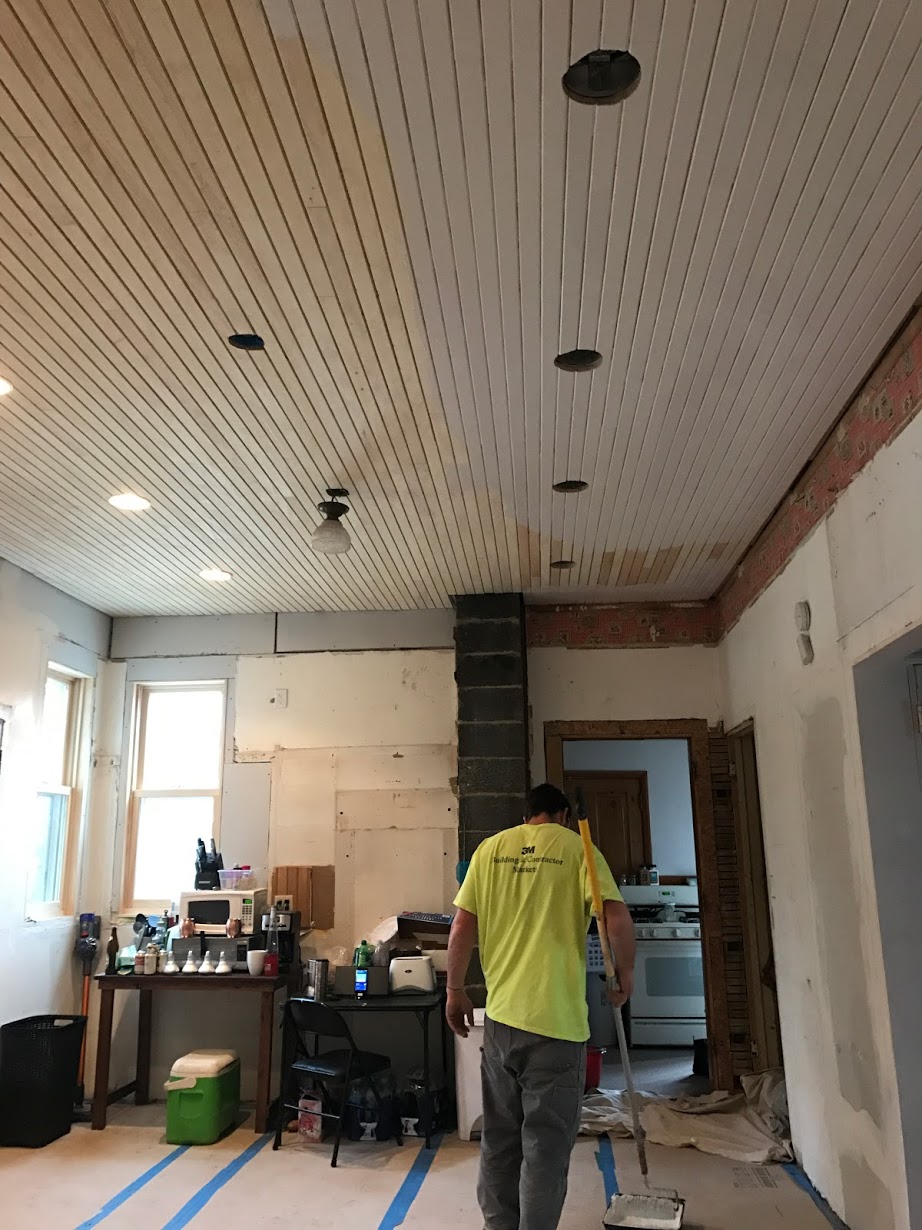
Finally we had gotten to a place of piecing it back together. A favorite thing of our kitchen is the ceiling. After all the recessed lighting had been installed, Travis began to install a bead board ceiling. I went back and forth on what to do for the ceiling, but knew I did not want just a plain drywalled ceiling. I considered a tin ceiling, but I am a weirdo and imagined grease layering onto the ceiling over time from cooking and it being impossible to clean. Who knows If this is actually a thing. We decided to use the porch bead board ceilings of the home as inspiration. Travis made an entire ceilings worth of bead board, tongue and groove ceiling, duplicated to look exactly like the porches. We could have just done the beadboard paneling you can buy in sheets, but lets face it. I do nothing easy for this poor man. In my mind it was well worth the headache. It looks amazing.
A start to the tongue and groove ceiling
Like I said before, Travis likes to do projects while I’m at work. (smart guy) I work nights during the week so this is typically his time to do things, so when I get home around 9pm, he usually greets me at the door with a kiss, grabs anything I’m carrying, and then reveals to me what he’s accomplished. It’s really sweet now that I realize it, as I’m writing this post. This kitchen ceiling bead board installation was no different. I walked in, excited to see it, and sadly I was quickly disappointed. I didn’t like it. Oh the horror! I couldn’t figure out what it was that I didn’t like, but I knew it was wrong. He had installed board by board, about 25% of the ceiling, and there I was, telling him I hated it.You can imagine his disappointment, as he had worked so hard to create every single board in his work shop, only for his crazy wife to be disappointed. I realized during the night what it was that I didn’t like. I often have epiphanys at night time. We had decided to install the ceiling parallel to the width of the room. That was it.This was the thing that felt wrong to me. I felt it was making the room seem stumpy. That’s the best word I can come up with. It felt like the ceiling was low, and not grand like I was imagining. So, one by one he took down all the ceiling he had installed. He then re-installed the tongue and groove pieces to be horizontal to the length of the room. It took about 5% of the ceiling to be re-installed for me to realize this was it. It was perfect. I was SO excited the bead board ceiling I had imagined looked how I imagined it. After he completed the entire ceiling, the beauty got a swipe or two of haint blue paint, just like the same paint on the porch ceilings. If you haven’t heard of haint blue, google it. Victorians and people of the past were so superstitious of things, and this was no different. Apparently painting a porch ceiling blue would keep the bad spirits out of their homes. Its just bananas the things they believed. I couldn’t be more thrilled with the way the ceiling turned out, and it is incredible the amount of people who ask us if it’s original to the home. Always the goal we’re going for!
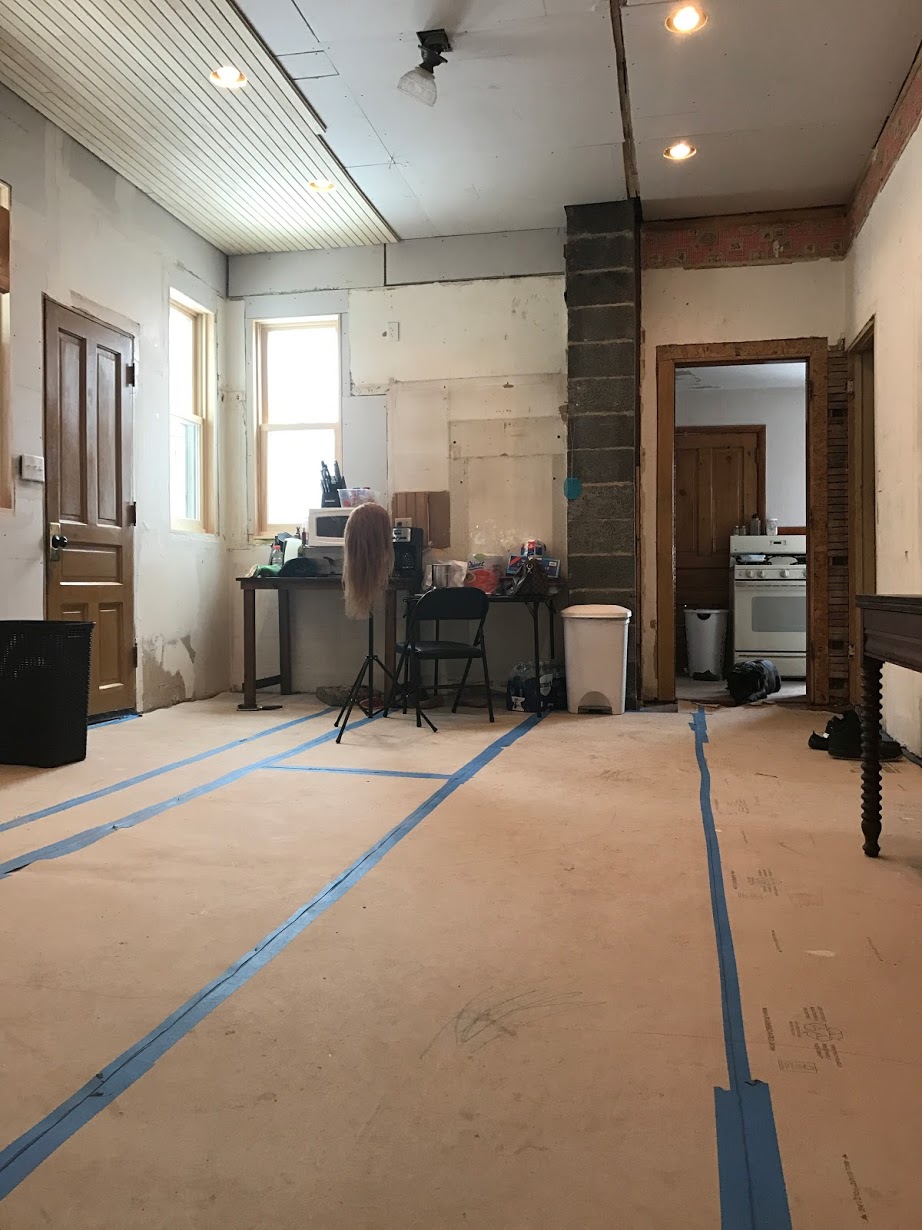
Hello manequin head on stand randomly in kitchen
Be still my heart
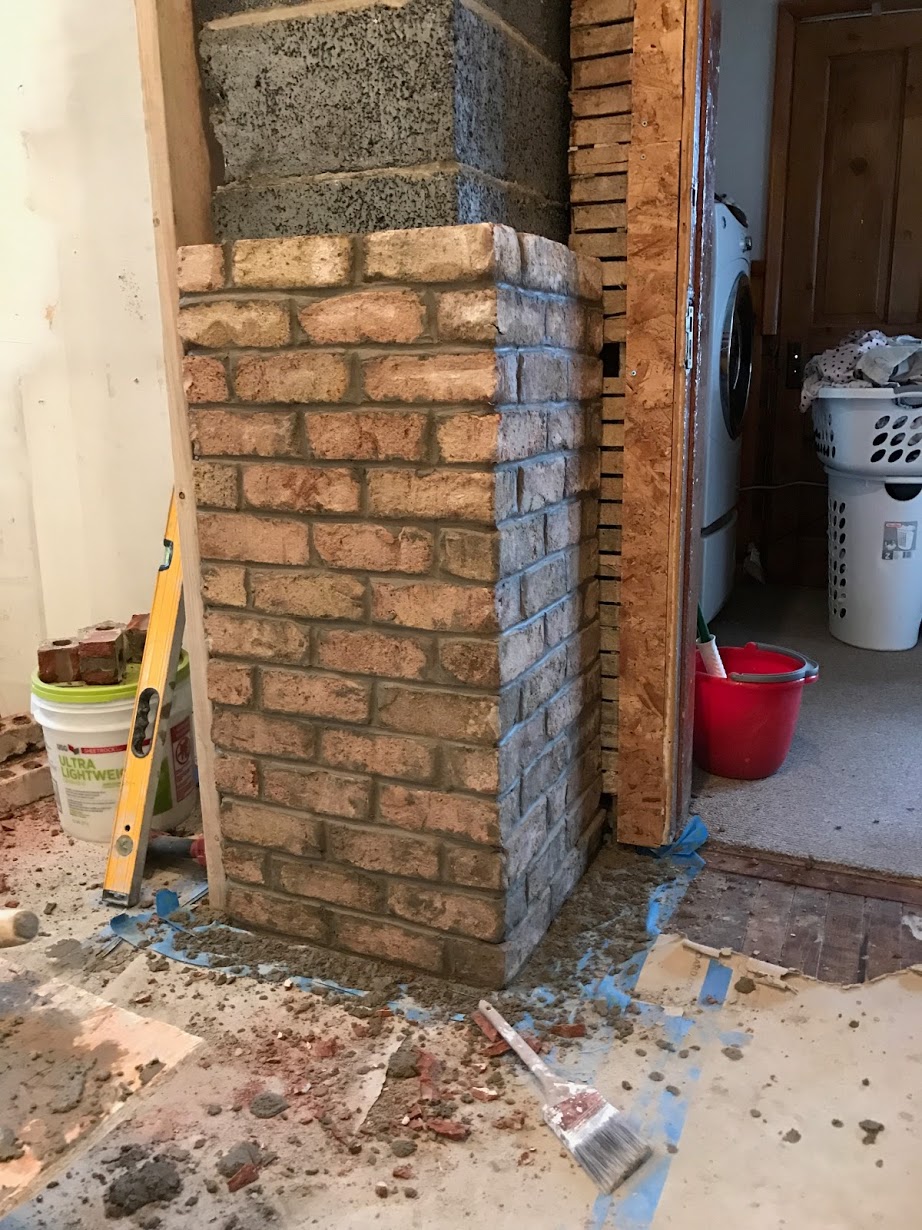
Lets talk exposed chimney. Many people see our exposed chimney and compliment how they love the original brick.. We love that compliment, because we know that it is not original brick. We know from the attic that the chimney WAS cream city brick, however someone rebuilt the portion of the kitchen chimney at some point with cement blocks. It was soooo ugly. Such a disappointment when we removed the faux brick that covering the chimney wall, only to find basement type cement blocks. Travis hunted down some bricks we could use to rebuild the chimney, to put back the authentic look of cream city brick. Here we go again. Travis worked on wrapping the chimney with the new bricks, while I was worked away in hair land late into the night. I came home, again excited to see the progress of the chimney. Can you guess what happened? I didn’t like it. My new problem was that the joints were too perfect. Any other normal human would hear that and be like what the heck is wrong it with your wifes brain. But in my head, I wanted it to look old, worn, and sort of crumbling. But still stable. No problem right Travis? So down came half the bricks off the chimney, that my poor husband had worked so hard to lay. This was definitely a fight. He literally started ripping them off the wall and putting them in a big pile of brick and wet mortar on my newly restored kitchen floor. At approximently 10pm at night. Obviously there was paper protecting these beautiful floors, but I remember imaging dents and dings going through that paper considering he was dropping BRICKS on the floor by the mass. I’m sure you can imagine his frustration. Usually his frustration stands for that nothing is good enough. It’s not that, everything he does it outstanding. It’s just I have this vision in my brain and when it doesn’t go as I imagined, I can’t help but want a solution to bring this vision to life. So, back up went the bricks. With crooked joint lines, some fat and some skinny. Do you guys know how hard it is to create something that looks messed up but still good? Second times a charm. Travis nailed it. I’m sure his perfectionist brain had a very difficult time laying bricks that weren’t perfect. But, it turned out incredible. You’d never know it wasn’t original. So here’s my tip on that. Rebuild old chimneys to look messed up and you will win at this task.
post second lay
The top is drying. How authentic does this look?!
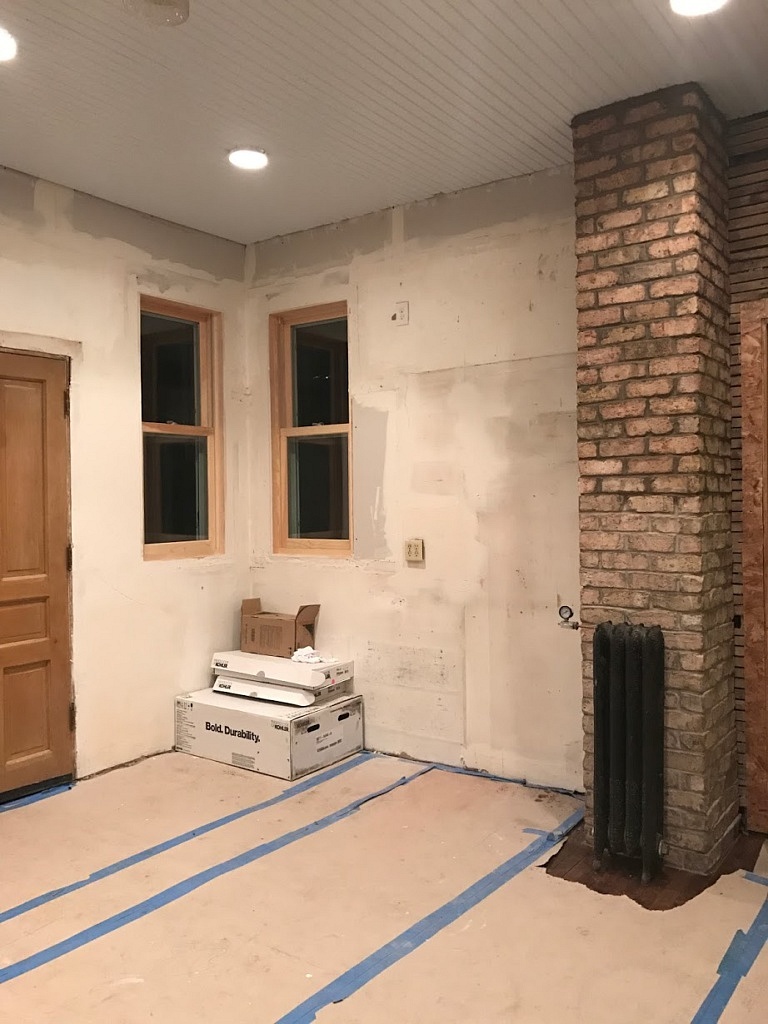
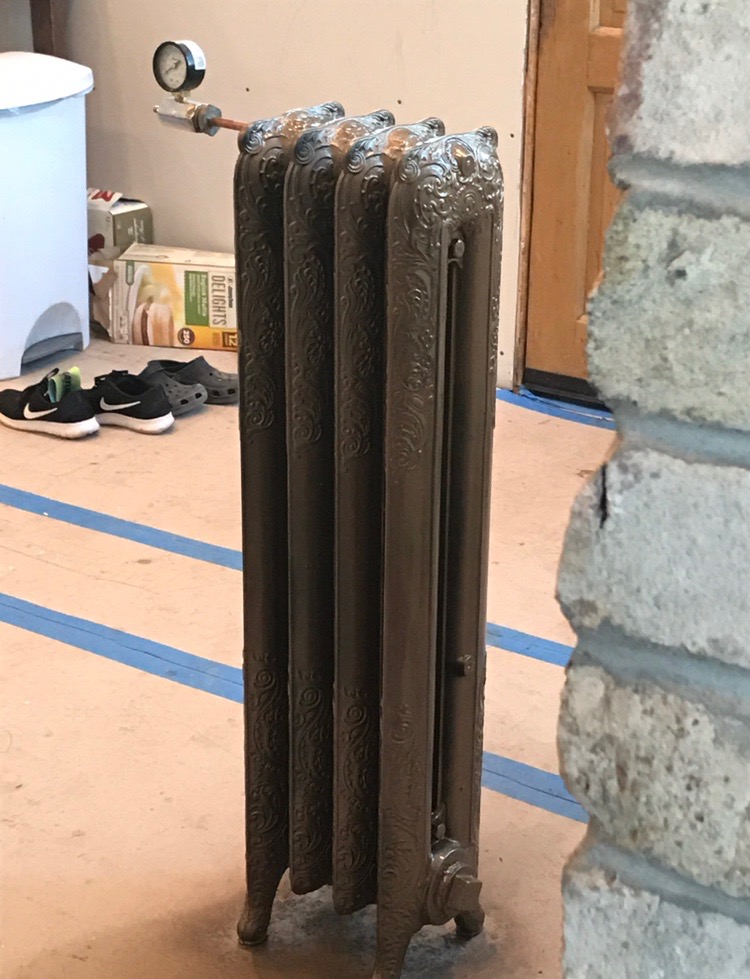
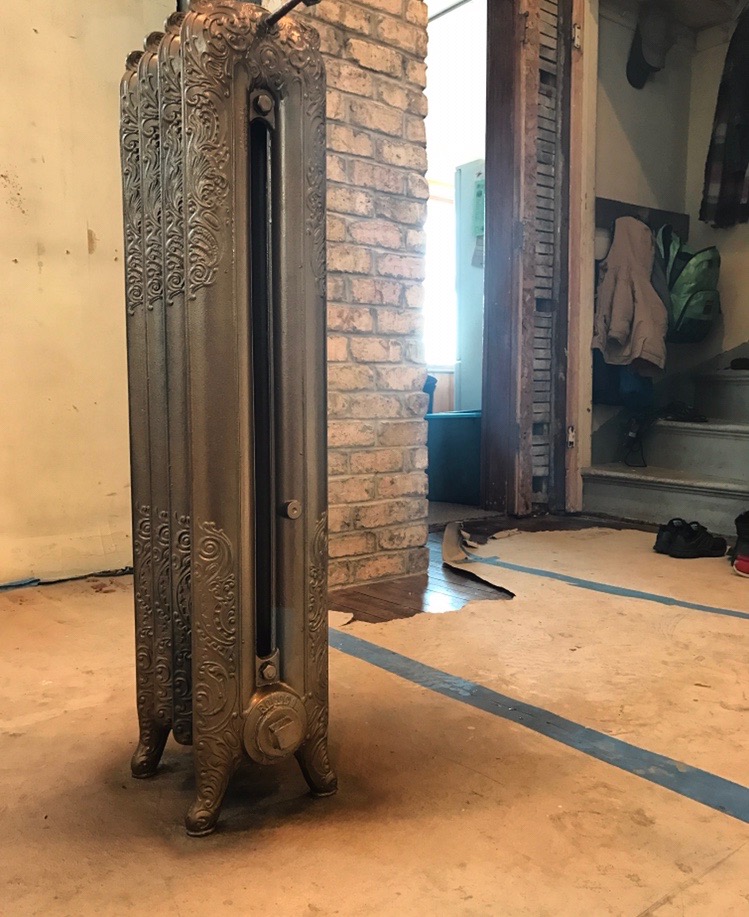
We added a small radiator to go in front of the chimney, again to help with making it feel authentic. I found this beautiful old radiator on craigslist, and it was shipped to us from Minnesota. The man who shipped to us was amazing to work with, and I will happily use him again if we ever replace any other radiators in our home. We only have a few ornate ones, which we prefer. This is a victorian house, so I like to glam it up whenever I can. It arrived damaged. Shocker. What the heck. One of the Corners of the radiator had been completely cracked off in shipping. Travis the magician was able to weld back on this corner. The craigslist man sent us a pressure gauge to test it with, to make sure the weld was good and remained sealed. This thing does have water that goes through it, so lets not have a mini leak that will ruin our brand new beautiful kitchen. The weld worked, and life carried on. We painted the radiator with the trusty bronze spray paint, and it turned out beautiful. Another feature of this kitchen that people say ” I love that original radiator.” Its such a compliment to us because recreating a victorian kitchen is hard.
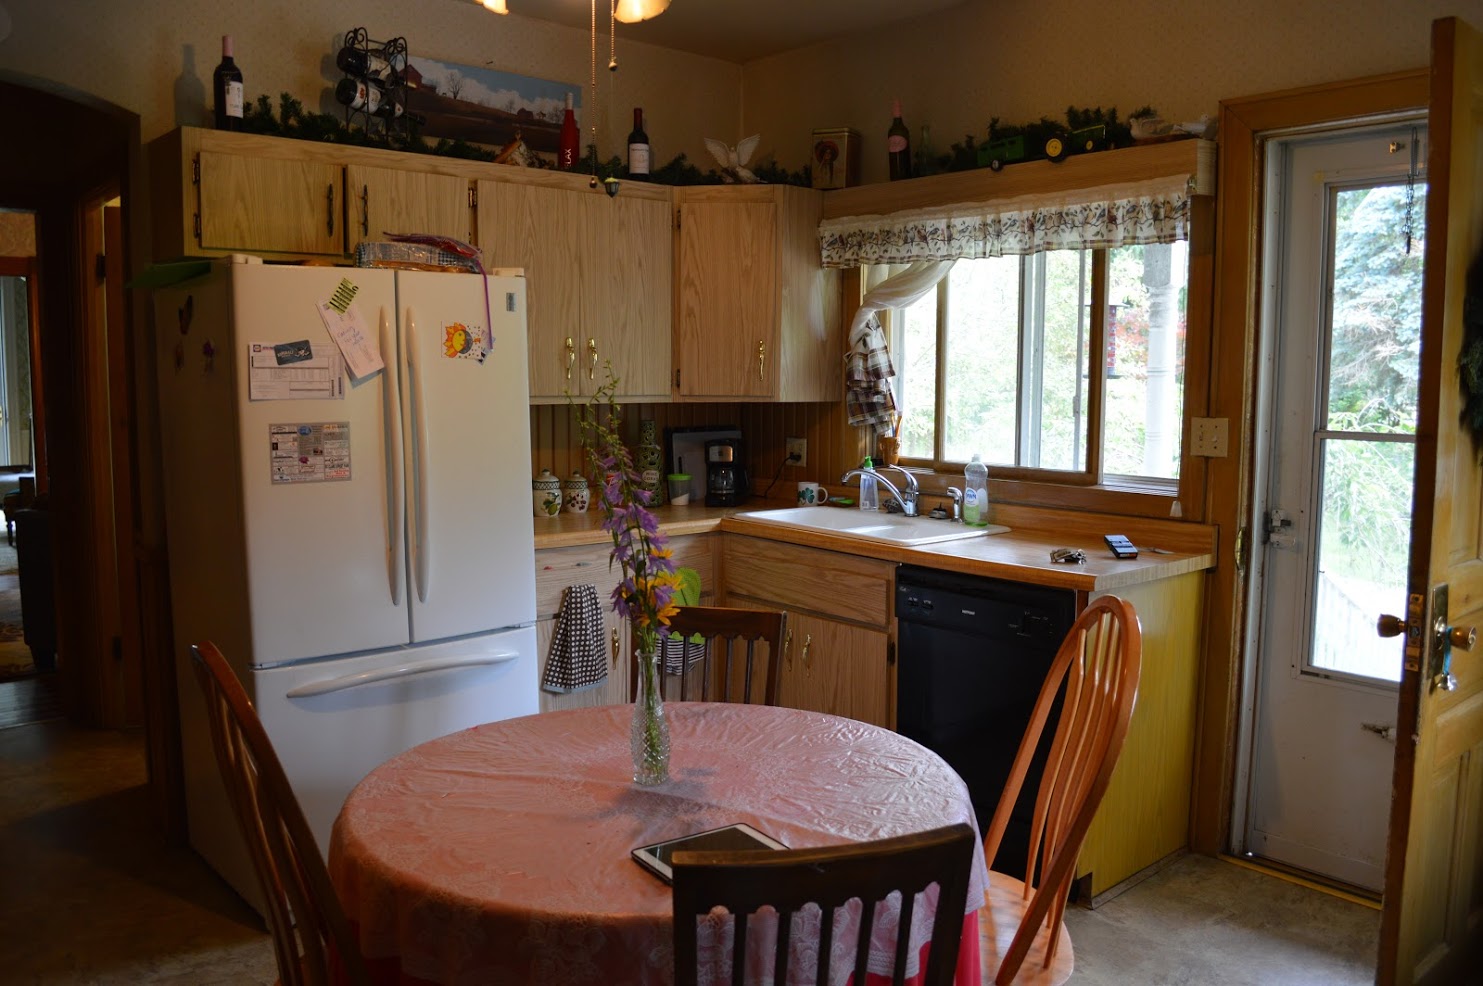
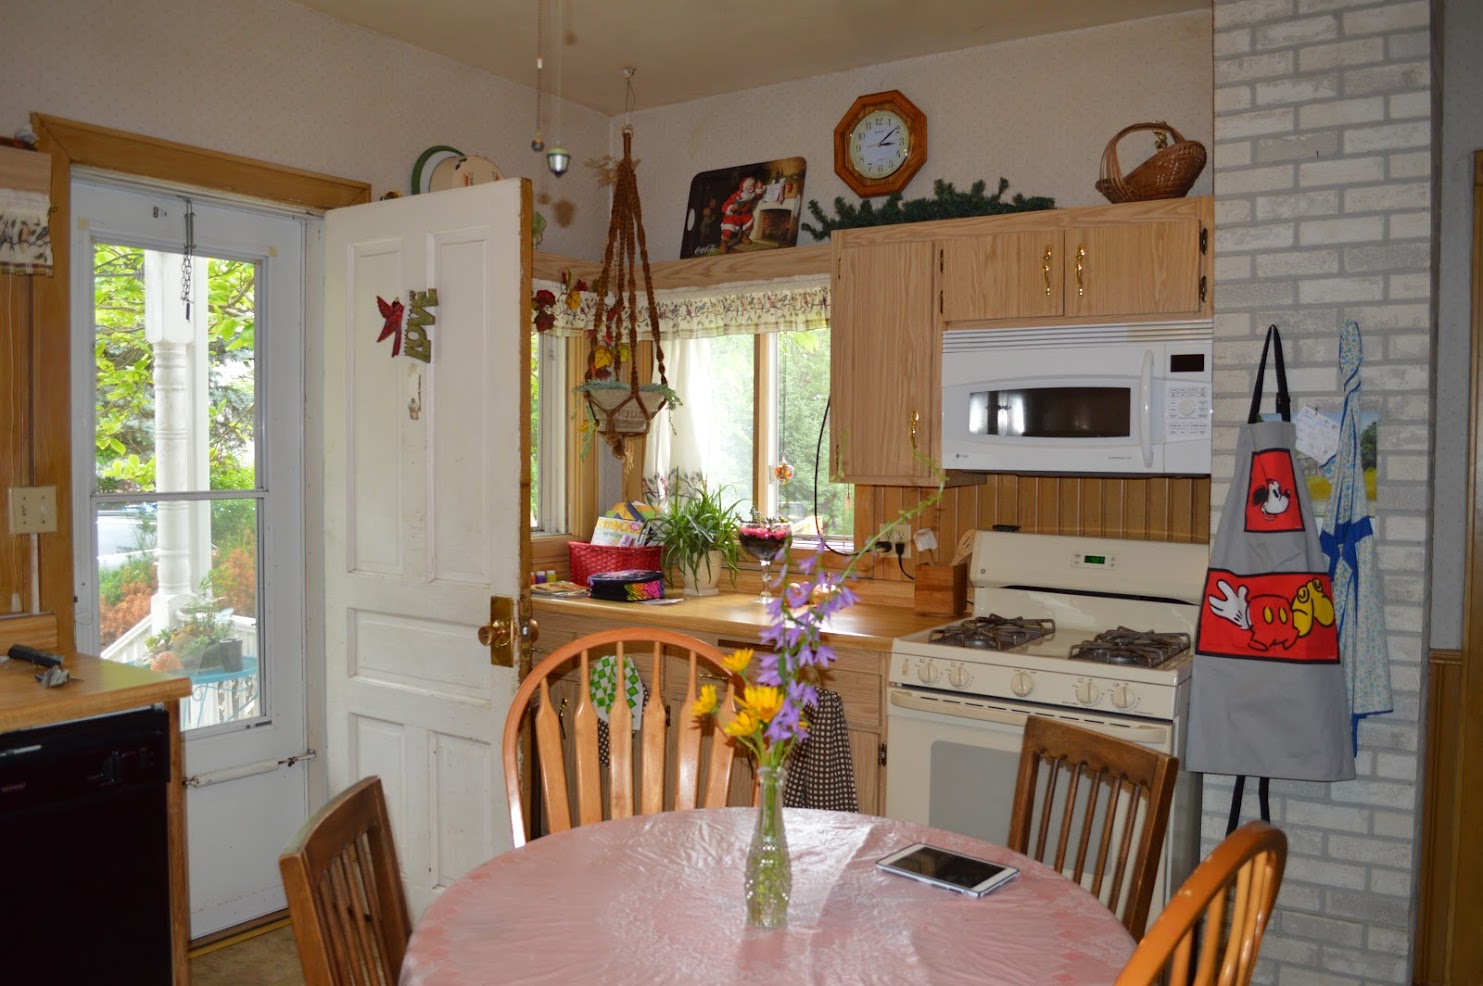
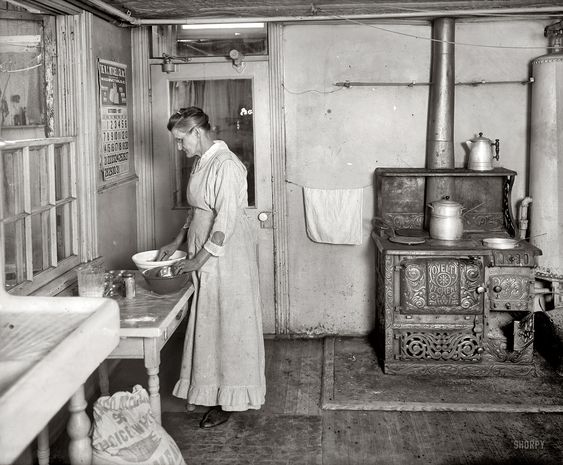
Victorian kitchens were made for function in 1892. Usually a kitchen table for a work space, a fire for cooking, possibly a hoosier or built in set of cabinets, a ice box, and avrocking chair. Nothing about our kitchen is authentic to an original farm house kitchen. But we did our absolute best to add glam to the home, while being tasteful to the age of the home. I like to think that if the people of this home could see it now, would appreciate the modern advances of 2018. They loved drama and glam so I hope they know that we are working hard to respect that.

authentic farmhouse kitchens, sources unknown
Whew that was a lot of writing. Hopefully you made it through all my rambling. I have legit worked on this part of the kitchen post on and off since May. I laugh as I write, because I’m reliving the memory of this process. I’m not telling you all the struggles for sympathy. I’m telling you them because of course now, you see the finished results on my Instagram and in the after photos. But this is real life. And this is what it’s like living through remodels and restoration. It’s HARD. But, we survived. Come back again for the next post as I continue to explain this process of a eight month long kitchen remodel.
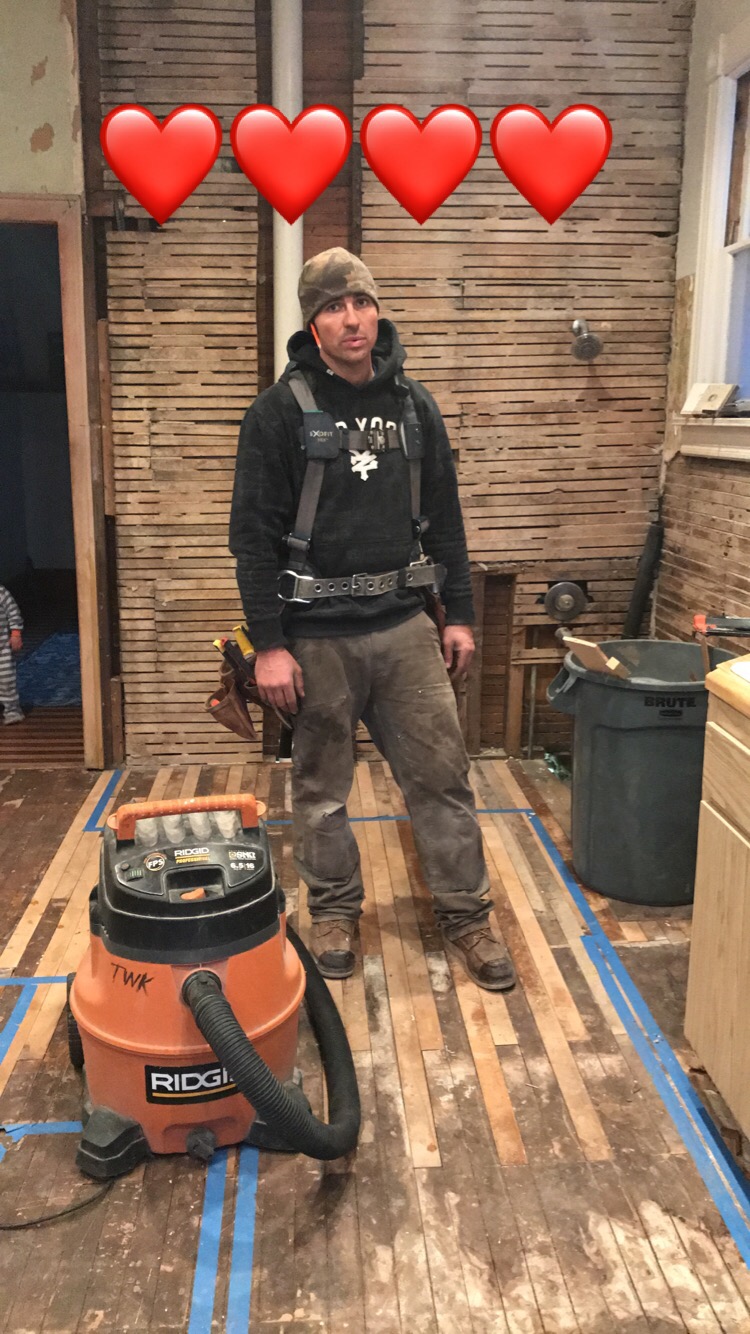
Lets give a round of applause for this guy
stay tuned for the part 2 of this adventure…..
![]()


One Comment